Integrate Address Finder or Postcode Lookup with Gravity Forms using custom HTML fields.
Features
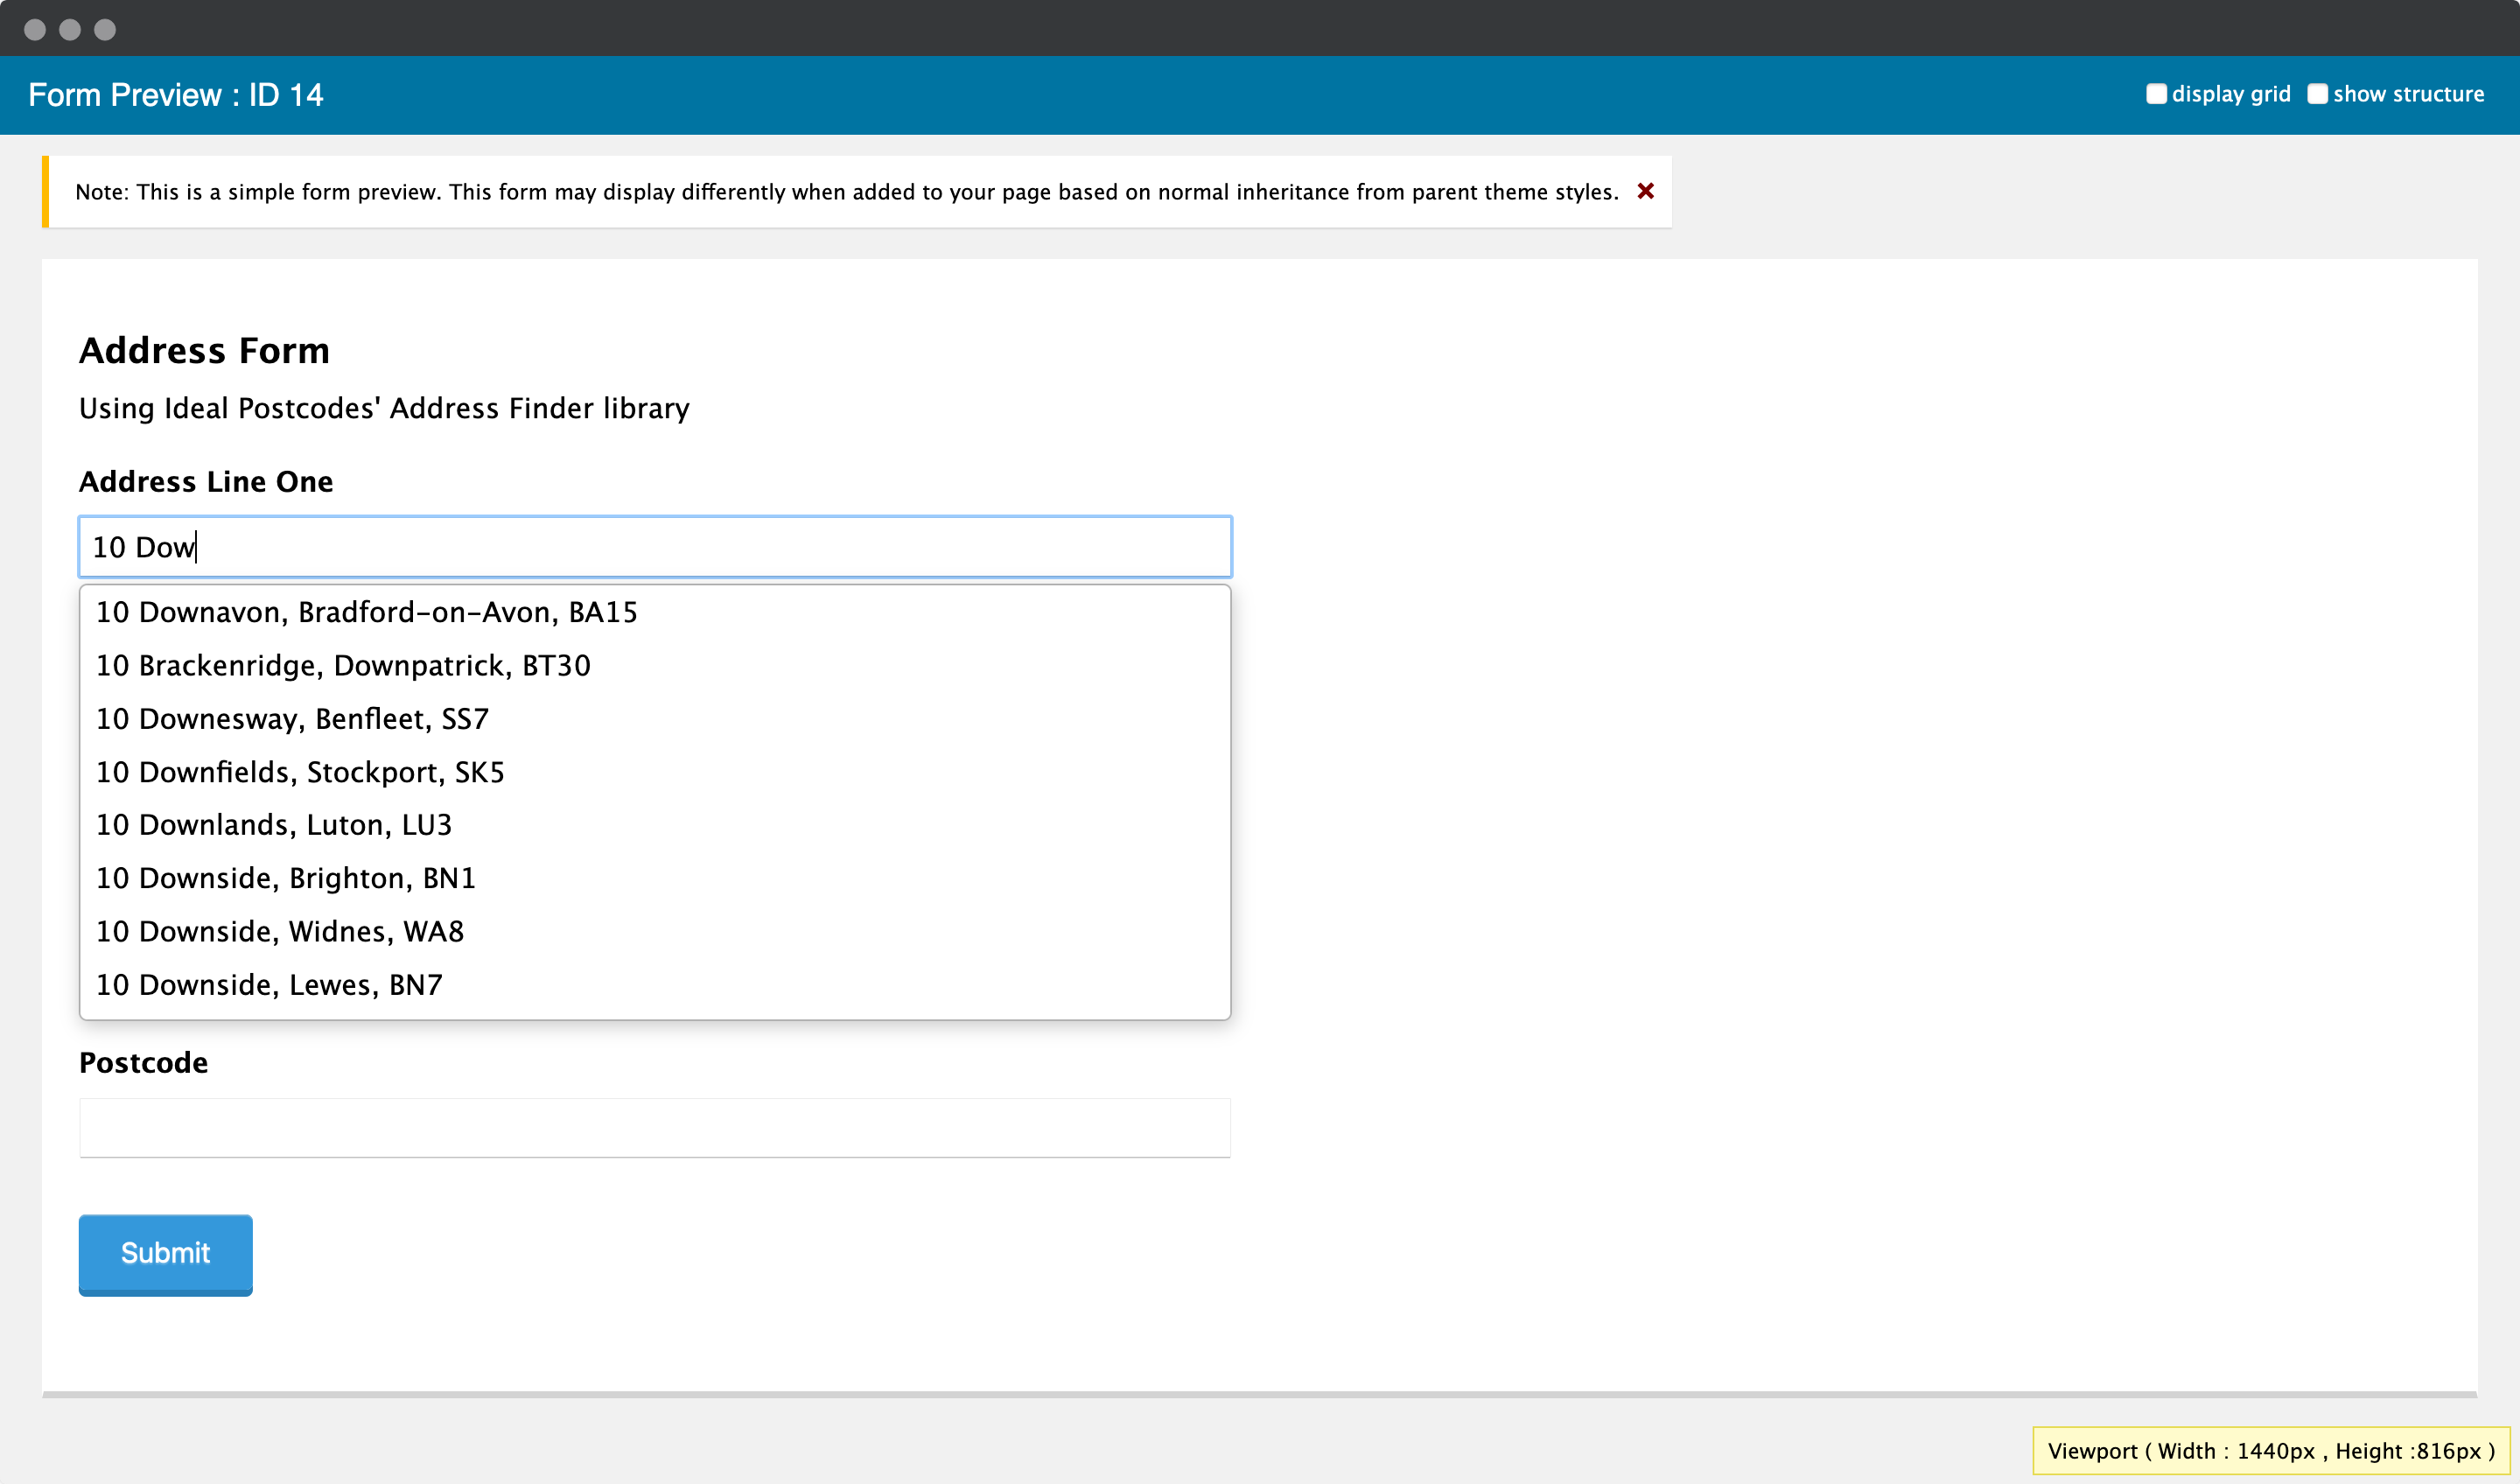
- Address autocompletion on any address field
- Postcode lookup with dropdown selection
Screenshots
Prerequisites
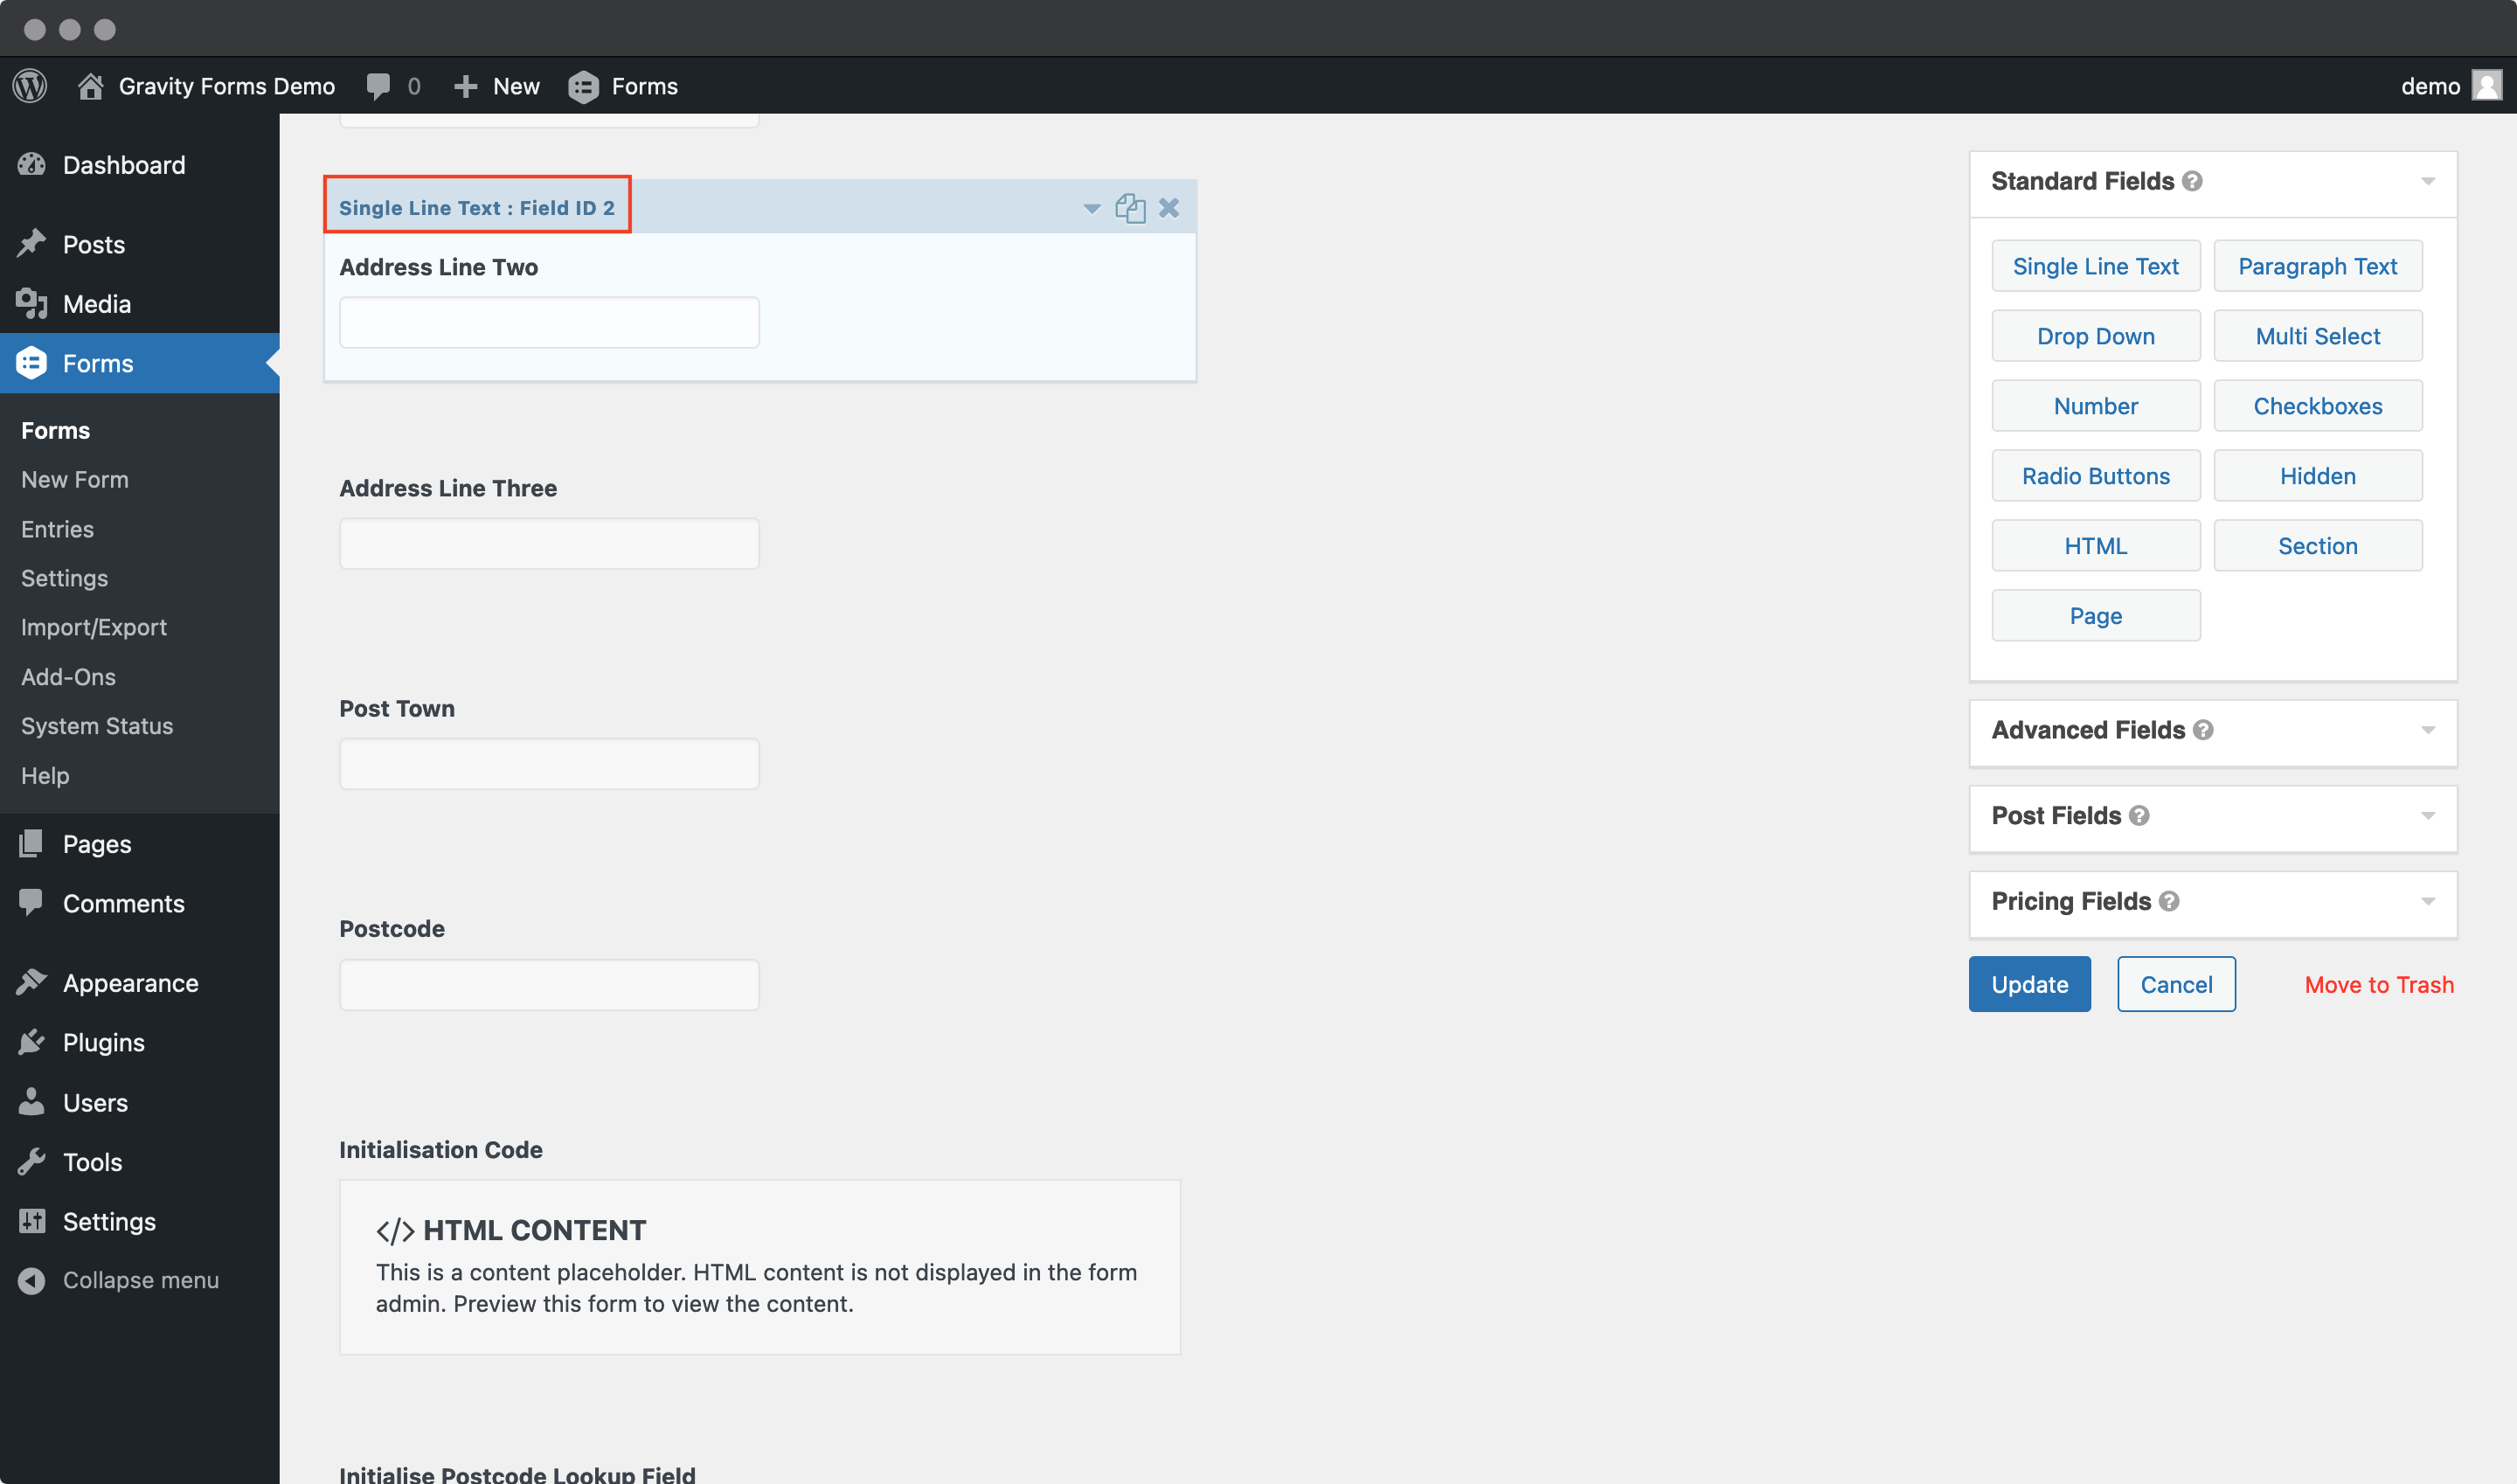
Create address input fields using Single Line Text fields (Standard Fields). Required fields:
- Address line one
- Address line two
- Address line three
- Post town
- Postcode
Note each field's Field ID from the Single Line Text panel. You'll need these for configuration.
Address Finder Setup
1. Add Script
Create an HTML field at the top of your form with the CDN script:
<script src="https://cdn.jsdelivr.net/npm/@ideal-postcodes/address-finder-bundled"></script>
2. Identify Field IDs
Note your address field IDs from the Single Line Text panels. For example:
- Line 1: Field ID
1 - Line 2: Field ID
2 - Line 3: Field ID
4 - Post Town: Field ID
5 - Postcode: Field ID
6
3. Add Initialisation
In the same HTML field, add the initialisation code, replacing input_X with your field IDs:
<script>
	document.addEventListener("DOMContentLoaded", function () {
		IdealPostcodes.AddressFinder.setup({
			apiKey: "ak_test",
			outputFields: {
				line_1: 'input[name="input_1"]',
				line_2: 'input[name="input_2"]',
				line_3: 'input[name="input_4"]',
				post_town: 'input[name="input_5"]',
				postcode: 'input[name="input_6"]',
			},
		});
	});
</script>
Replace ak_test with your API key. If your Line 1 Field ID is 24, use 'input[name="input_24"]'.
Add additional fields from the addresses API documentation as needed (e.g., county, country).
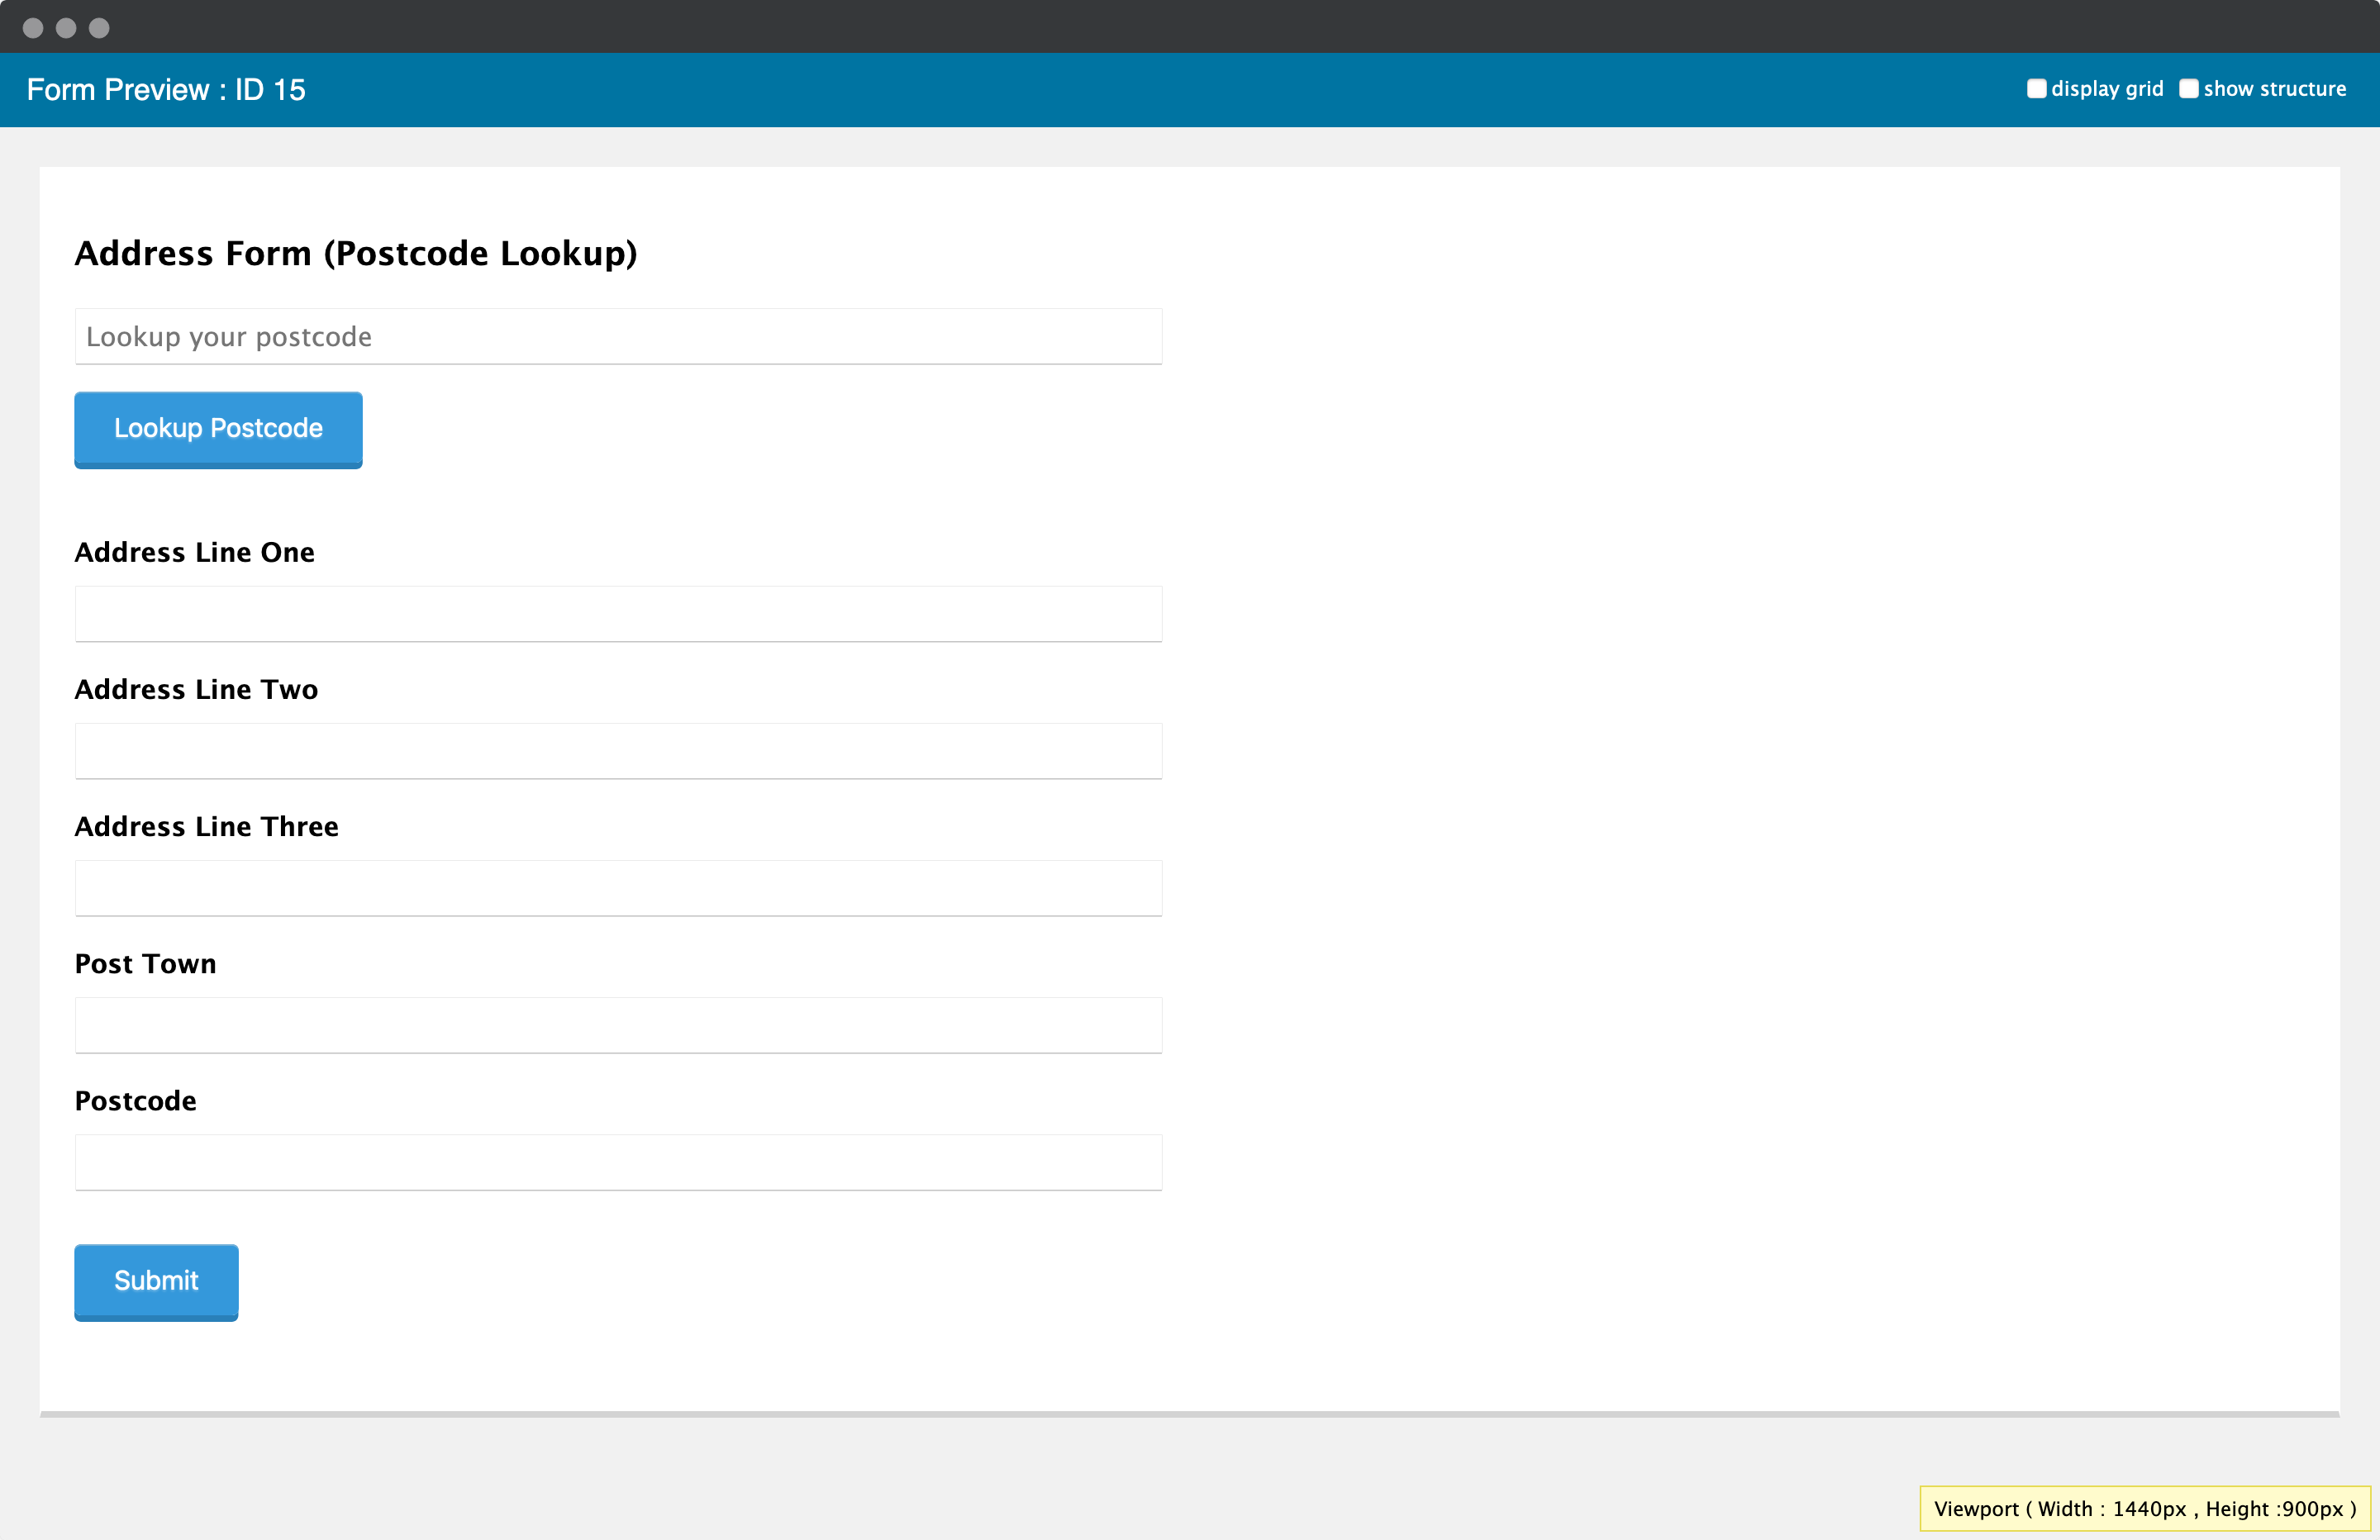
Postcode Lookup Setup
1. Add Lookup HTML
Create an HTML Content field above your address fields with the lookup interface:
<div>
	<div>
		<input type="text" placeholder="Lookup your postcode" id="idpc_input" />
	</div>
	<div>
		<input type="button" id="idpc_button" value="Lookup Postcode" />
	</div>
	<div id="idpc_dropdown"></div>
	<div id="idpc"></div>
</div>
Optional: Style for Gravity Forms theme:
<div class="gform_wrapper">
	<div class="ginput_container ginput_container_text">
		<input type="text" placeholder="Lookup your postcode" class="medium" id="idpc_input" />
	</div>
	<div class="gform_footer" style="margin: 0;">
		<input type="button" id="idpc_button" class="gform_button button" value="Lookup Postcode" />
		<div id="idpc_dropdown" style="margin-top: 1em"></div>
		<div id="idpc"></div>
	</div>
</div>
2. Identify Field IDs
Same as Address Finder - note your address field IDs from the Single Line Text panels.
3. Add Script and Initialisation
Add another HTML field at the bottom of your form:
<script src="https://cdn.jsdelivr.net/npm/@ideal-postcodes/postcode-lookup-bundled"></script>

<script>
	document.addEventListener("DOMContentLoaded", function () {
		IdealPostcodes.PostcodeLookup.setup({
			apiKey: "ak_test",
			context: "#idpc",
			button: "#idpc_button",
			input: "#idpc_input",
			selectClass: "#idpc_dropdown",
			outputFields: {
				line_1: 'input[name="input_1"]',
				line_2: 'input[name="input_2"]',
				line_3: 'input[name="input_3"]',
				post_town: 'input[name="input_4"]',
				postcode: 'input[name="input_5"]',
			},
		});
	});
</script>
Replace ak_test with your API key and update input_X with your field IDs.
Further Configuration
- Address Finder Plugin Documentation - Customisation options
- Postcode Lookup Plugin Documentation - Customisation options
- Support: support@ideal-postcodes.co.uk