Installing Address Validation & Postcode Lookup for ShopWired
This guide walks you through installing and configuring the Ideal Postcodes address validation integration for ShopWired. The integration enables address finder or postcode lookup at checkout, account address forms, and admin pages.
Overview
What this integration provides:
- Real-time UK address validation and postcode lookup
- Enhanced checkout experience with faster address entry
- Reduced delivery errors and customer support tickets
- Improved data quality across all address collection points
Choose Your Method: Use the integration for Address Finder or UK Postcode Lookup to enhance your ShopWired checkout experience. If unsure which method is best, read our Address Finder vs Postcode Lookup comparison guide.
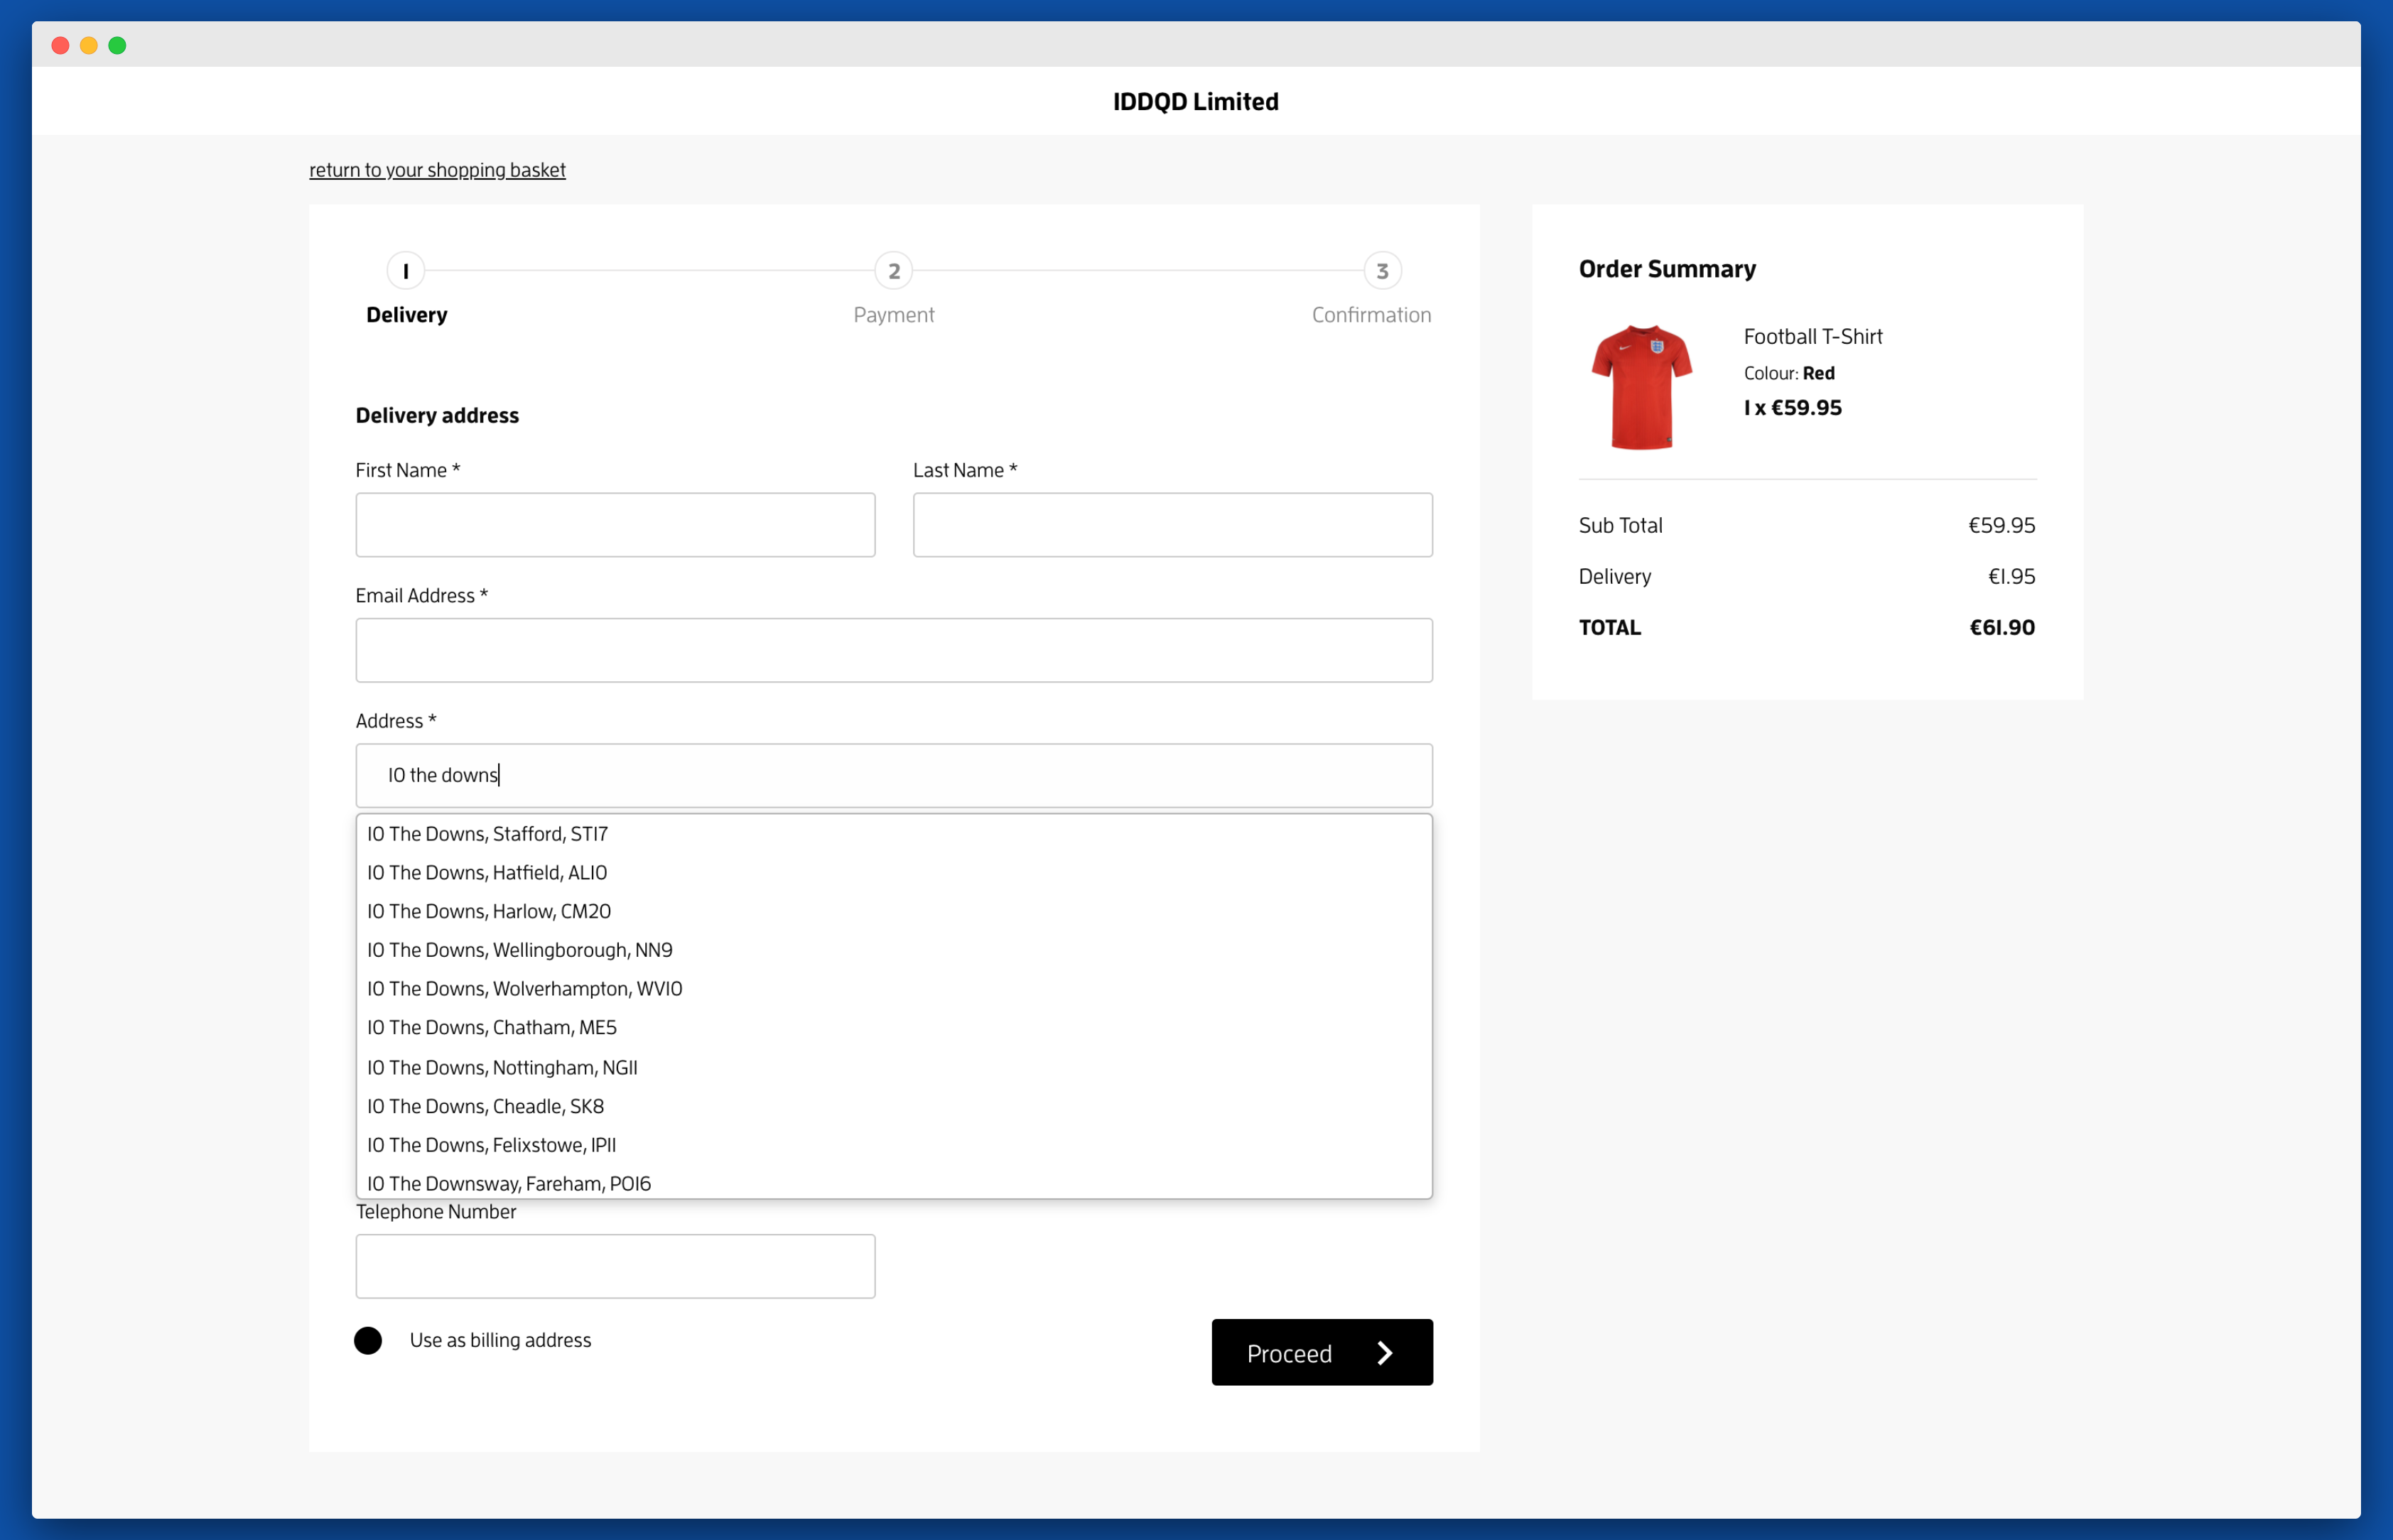
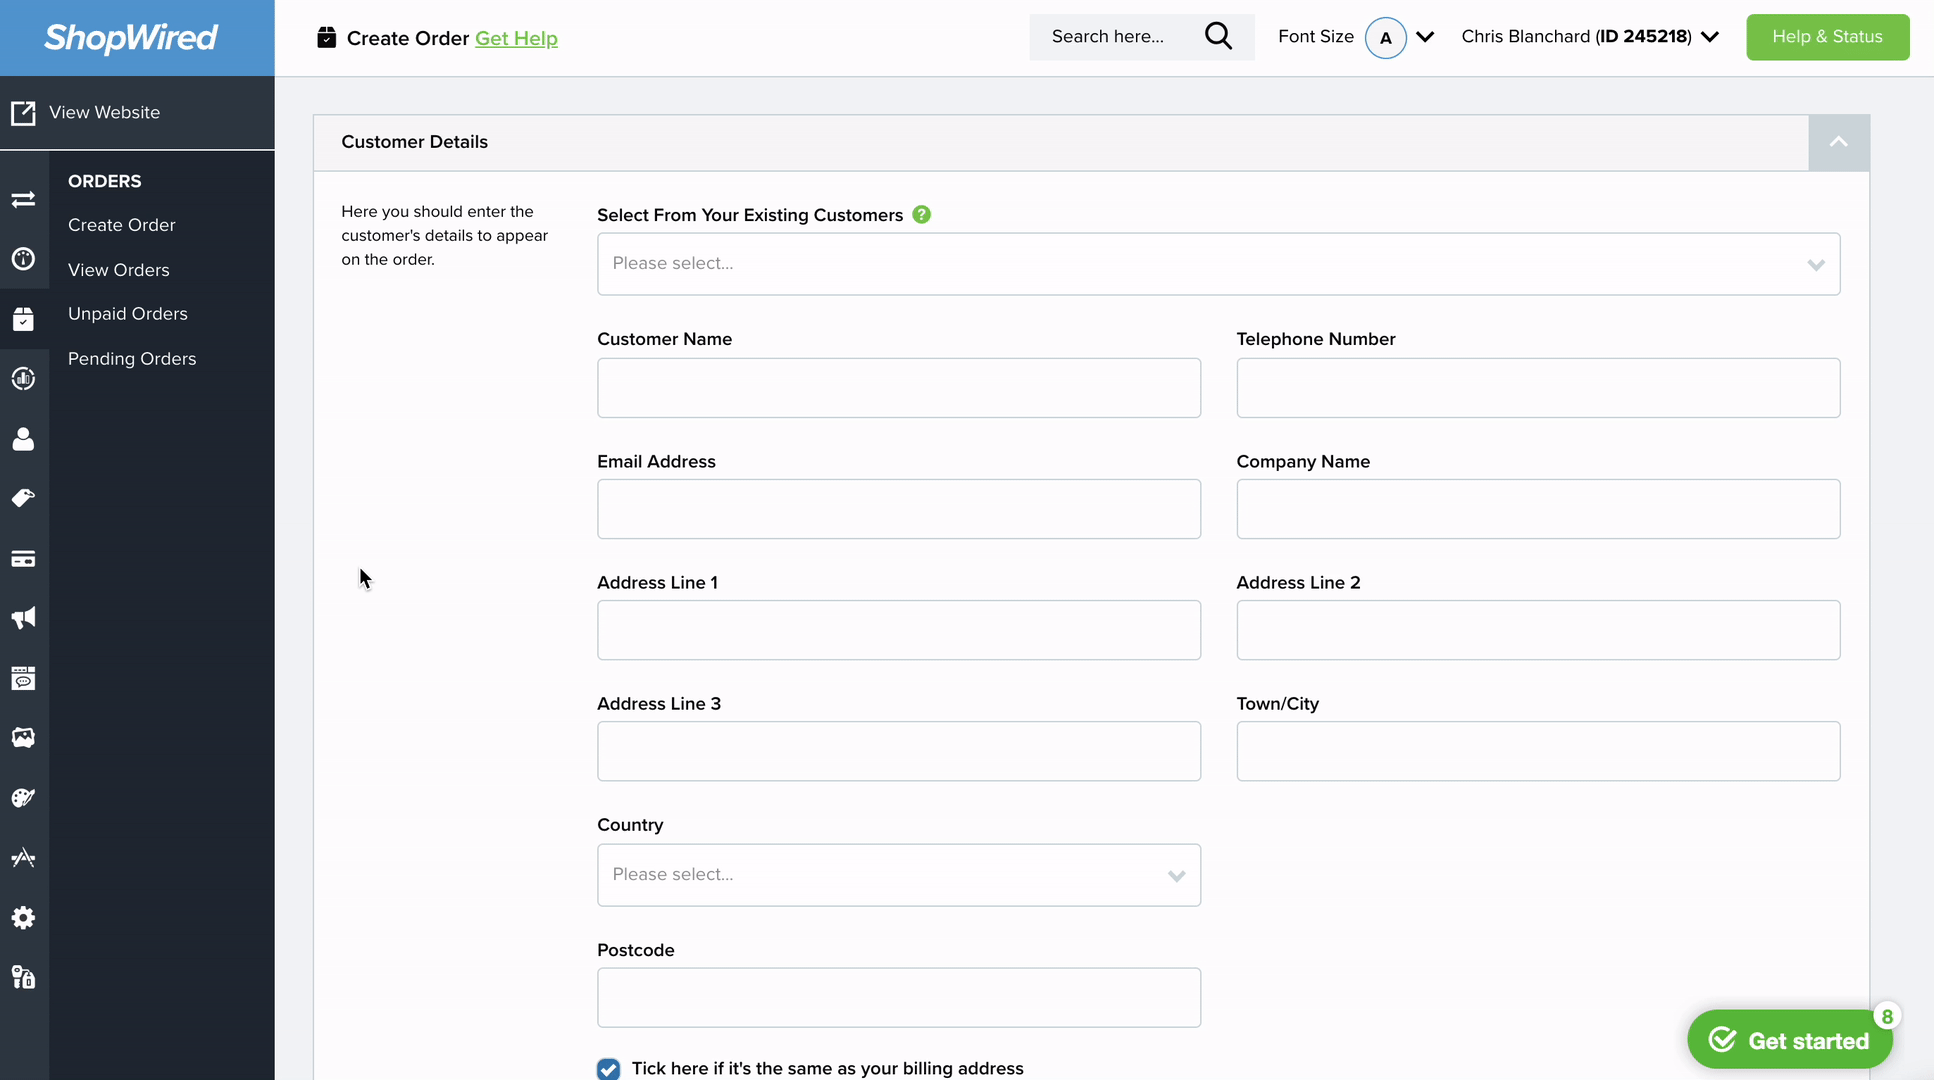
Where Address Lookup is Applied
The integration adds address validation or postcode lookup to:
- Checkout Billing Form - Customer billing address entry
- Checkout Shipping Form - Customer shipping address entry
- Account Address Forms - Customer address book management
- Admin Dashboard - Via Browser Extension (optional)
Screenshots
Address Finder
Postcode Lookup

1. Sign up for a Free Trial and Get Your API Key
Before installing the integration, you'll need an Ideal Postcodes API Key.
Steps:
- Sign up for a free account at ideal-postcodes.co.uk/sign-up
- Navigate to the KEYS section in your account
- Copy your API Key - you'll need this to complete the setup in ShopWired. It's a string of characters that begins with the letters
ak_
💡 All new accounts include 50 free test credits - no payment required.
2. Install the ShopWired Integration
You can install address validation on different pages of your ShopWired site. Choose the installation method(s) based on where you want address validation to appear.
Prepare Your Script
Both installation methods use a similar script with your API Key. You'll customise this based on your needs.
Method A: Checkout Page (Recommended)
Best for: Checkout billing and shipping address validation.
Steps:
-
From your ShopWired Admin, go to Checkout → Design and Display
-
Scroll down to Advanced Customisation and click the JS tab
-
In the Script contents editor, paste the following code:
<script>
	window.idpcConfig = {
		apiKey: "ak_xxxxxxxxxx", // Replace with your actual API Key
		autocompleteOverride: {
			populateCounty: false,
			populateOrganisation: false,
		},
		postcodeLookupOverride: {
			populateCounty: false,
			populateOrganisation: false,
		},
	};
</script>

<script
	async
	type="text/javascript"
	crossorigin="anonymous"
	src="https://cdn.jsdelivr.net/npm/@ideal-postcodes/shopwired@3.0.2/dist/shopwired.min.js"
></script>
- Replace
ak_xxxxxxxxxxwith your actual API Key from Step 1 - Click Save
Method B: Account Pages (Optional)
Best for: Account registration and address book pages.
When to use: If you want address validation beyond checkout forms.
Steps:
-
From your ShopWired Admin, go to Website → Themes
-
Click Code Editor
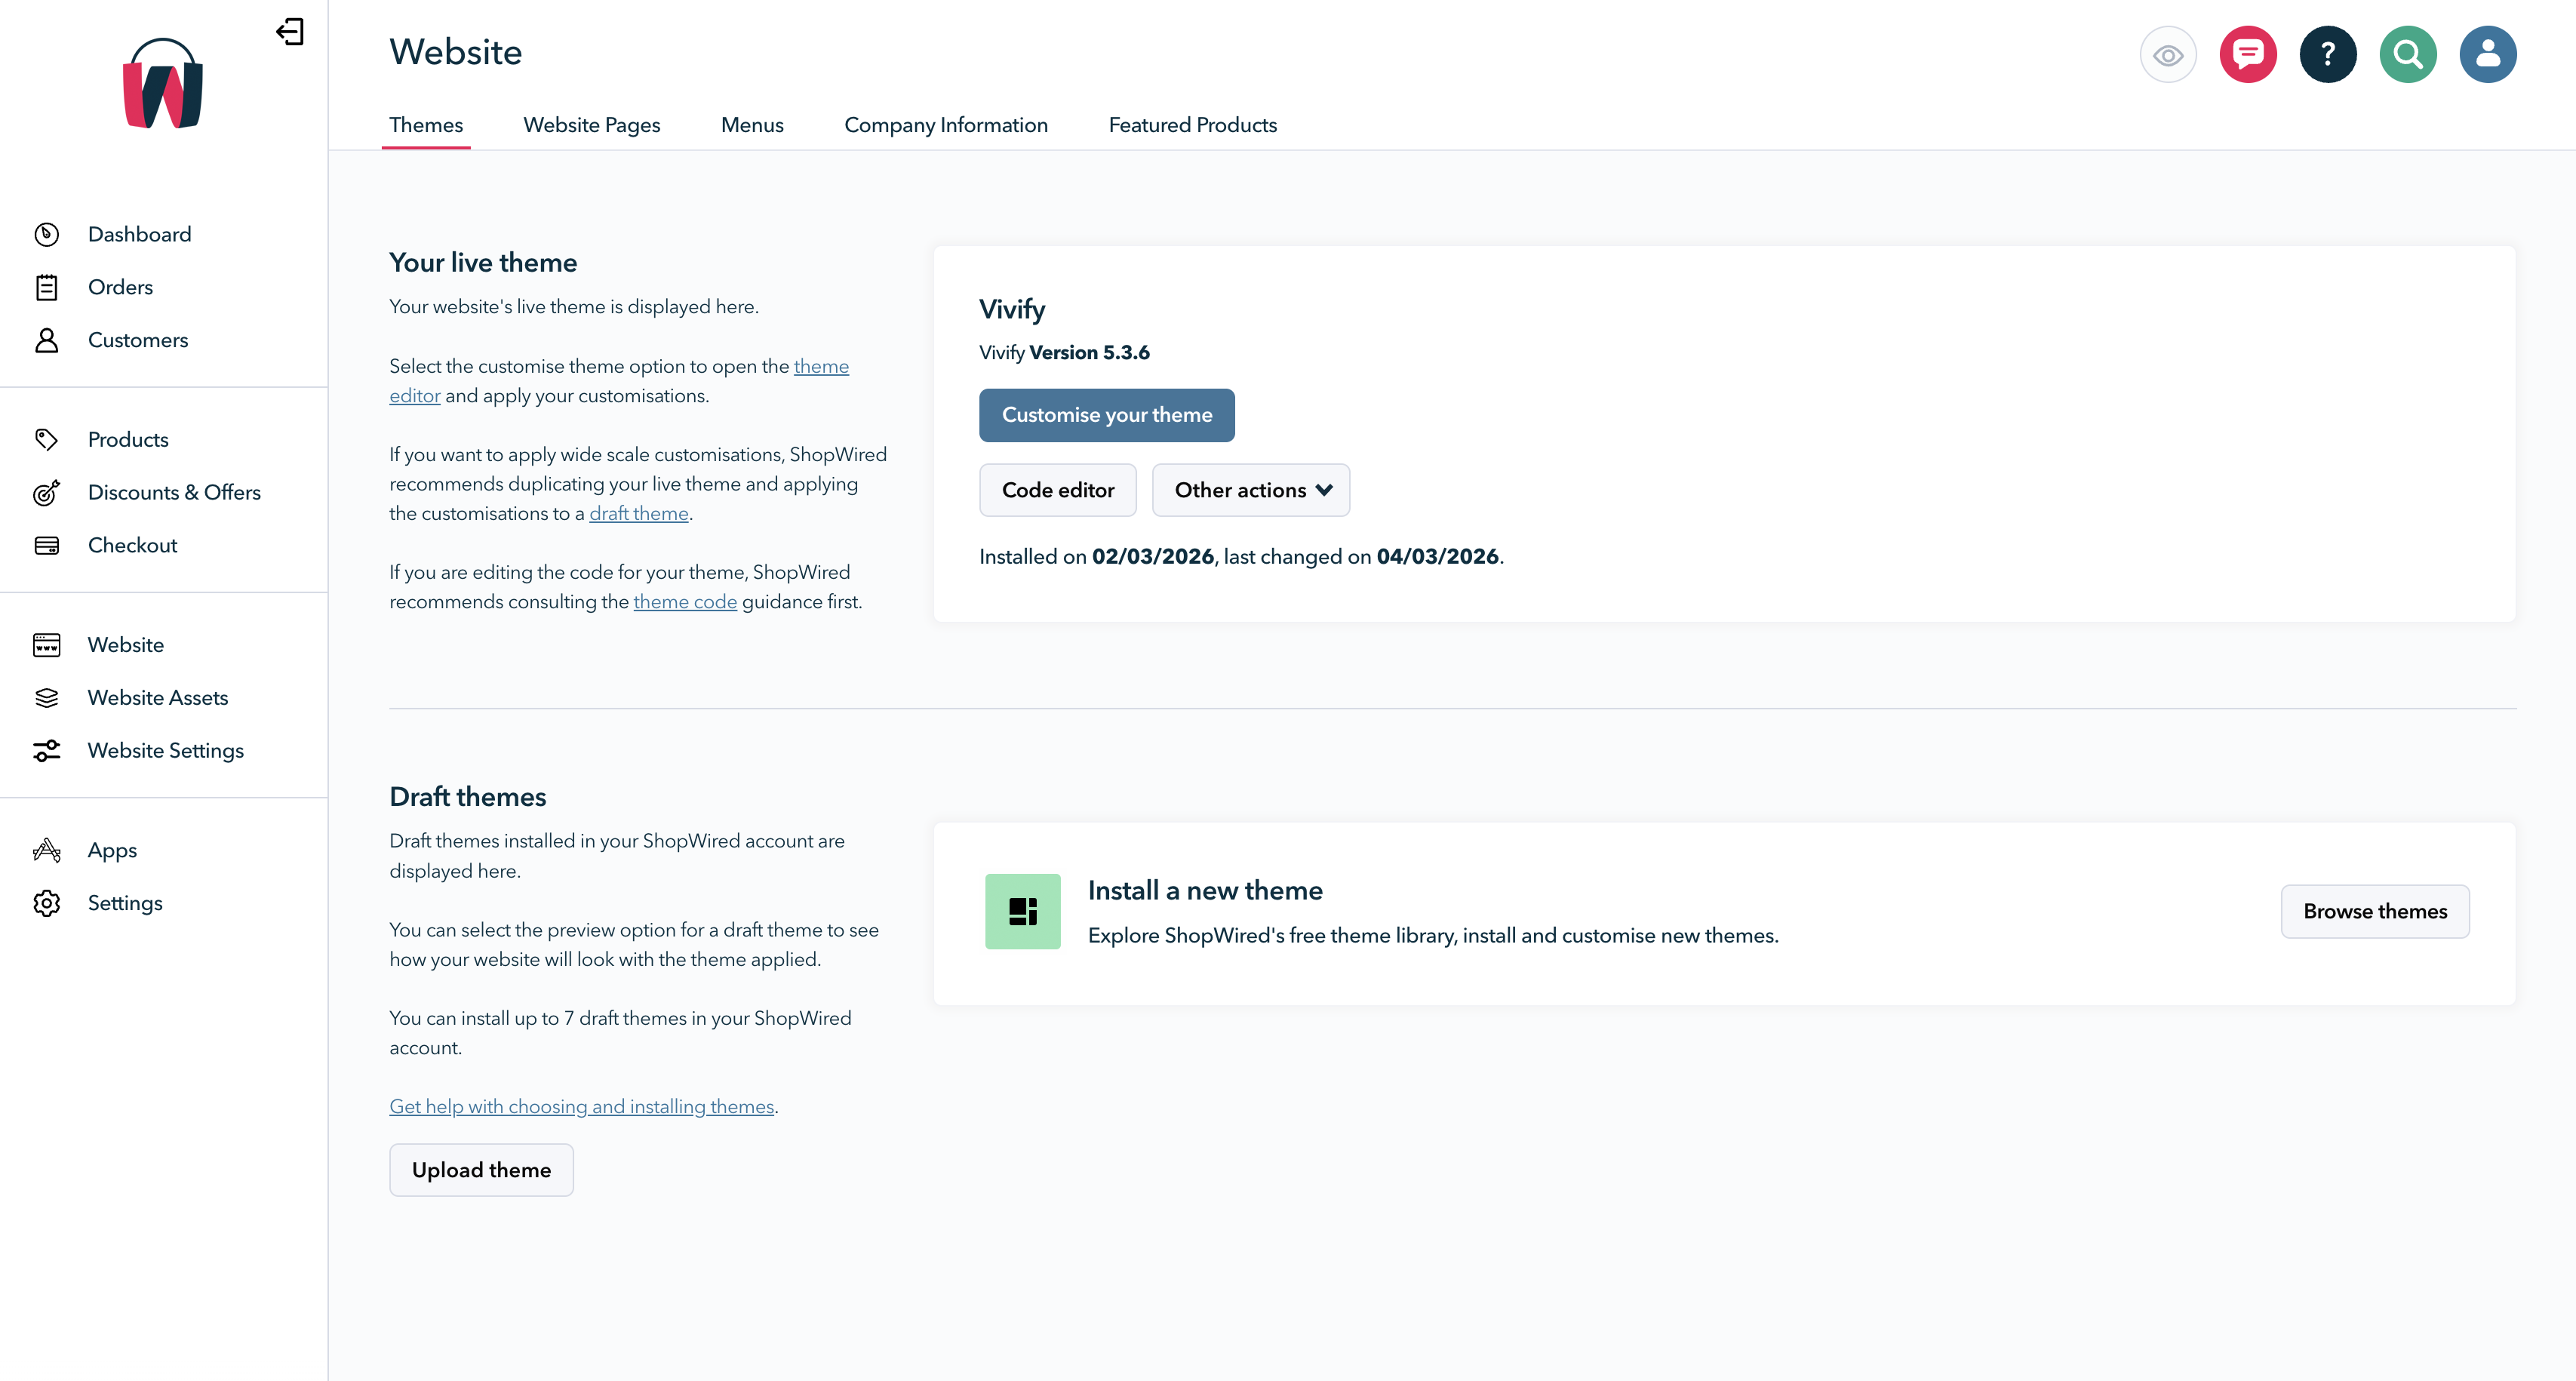
-
Navigate to Views → Templates → master.twig
-
Scroll to the bottom of the editor, just before the
</body>tag -
Paste the following code:
<script>
	window.idpcConfig = {
		apiKey: "ak_xxxxxxxxxx", // Replace with your actual API Key

		// Enable/disable lookup methods
		postcodeLookup: true, // Enable Postcode Lookup
		autocomplete: true, // Enable Address Finder

		autocompleteOverride: {
			populateCounty: false,
			populateOrganisation: true,
		},
		postcodeLookupOverride: {
			populateCounty: false,
			populateOrganisation: true,
		},
	};
</script>

<script
	async
	type="text/javascript"
	crossorigin="anonymous"
	src="https://cdn.jsdelivr.net/npm/@ideal-postcodes/shopwired@3.0.2/dist/shopwired.min.js"
></script>
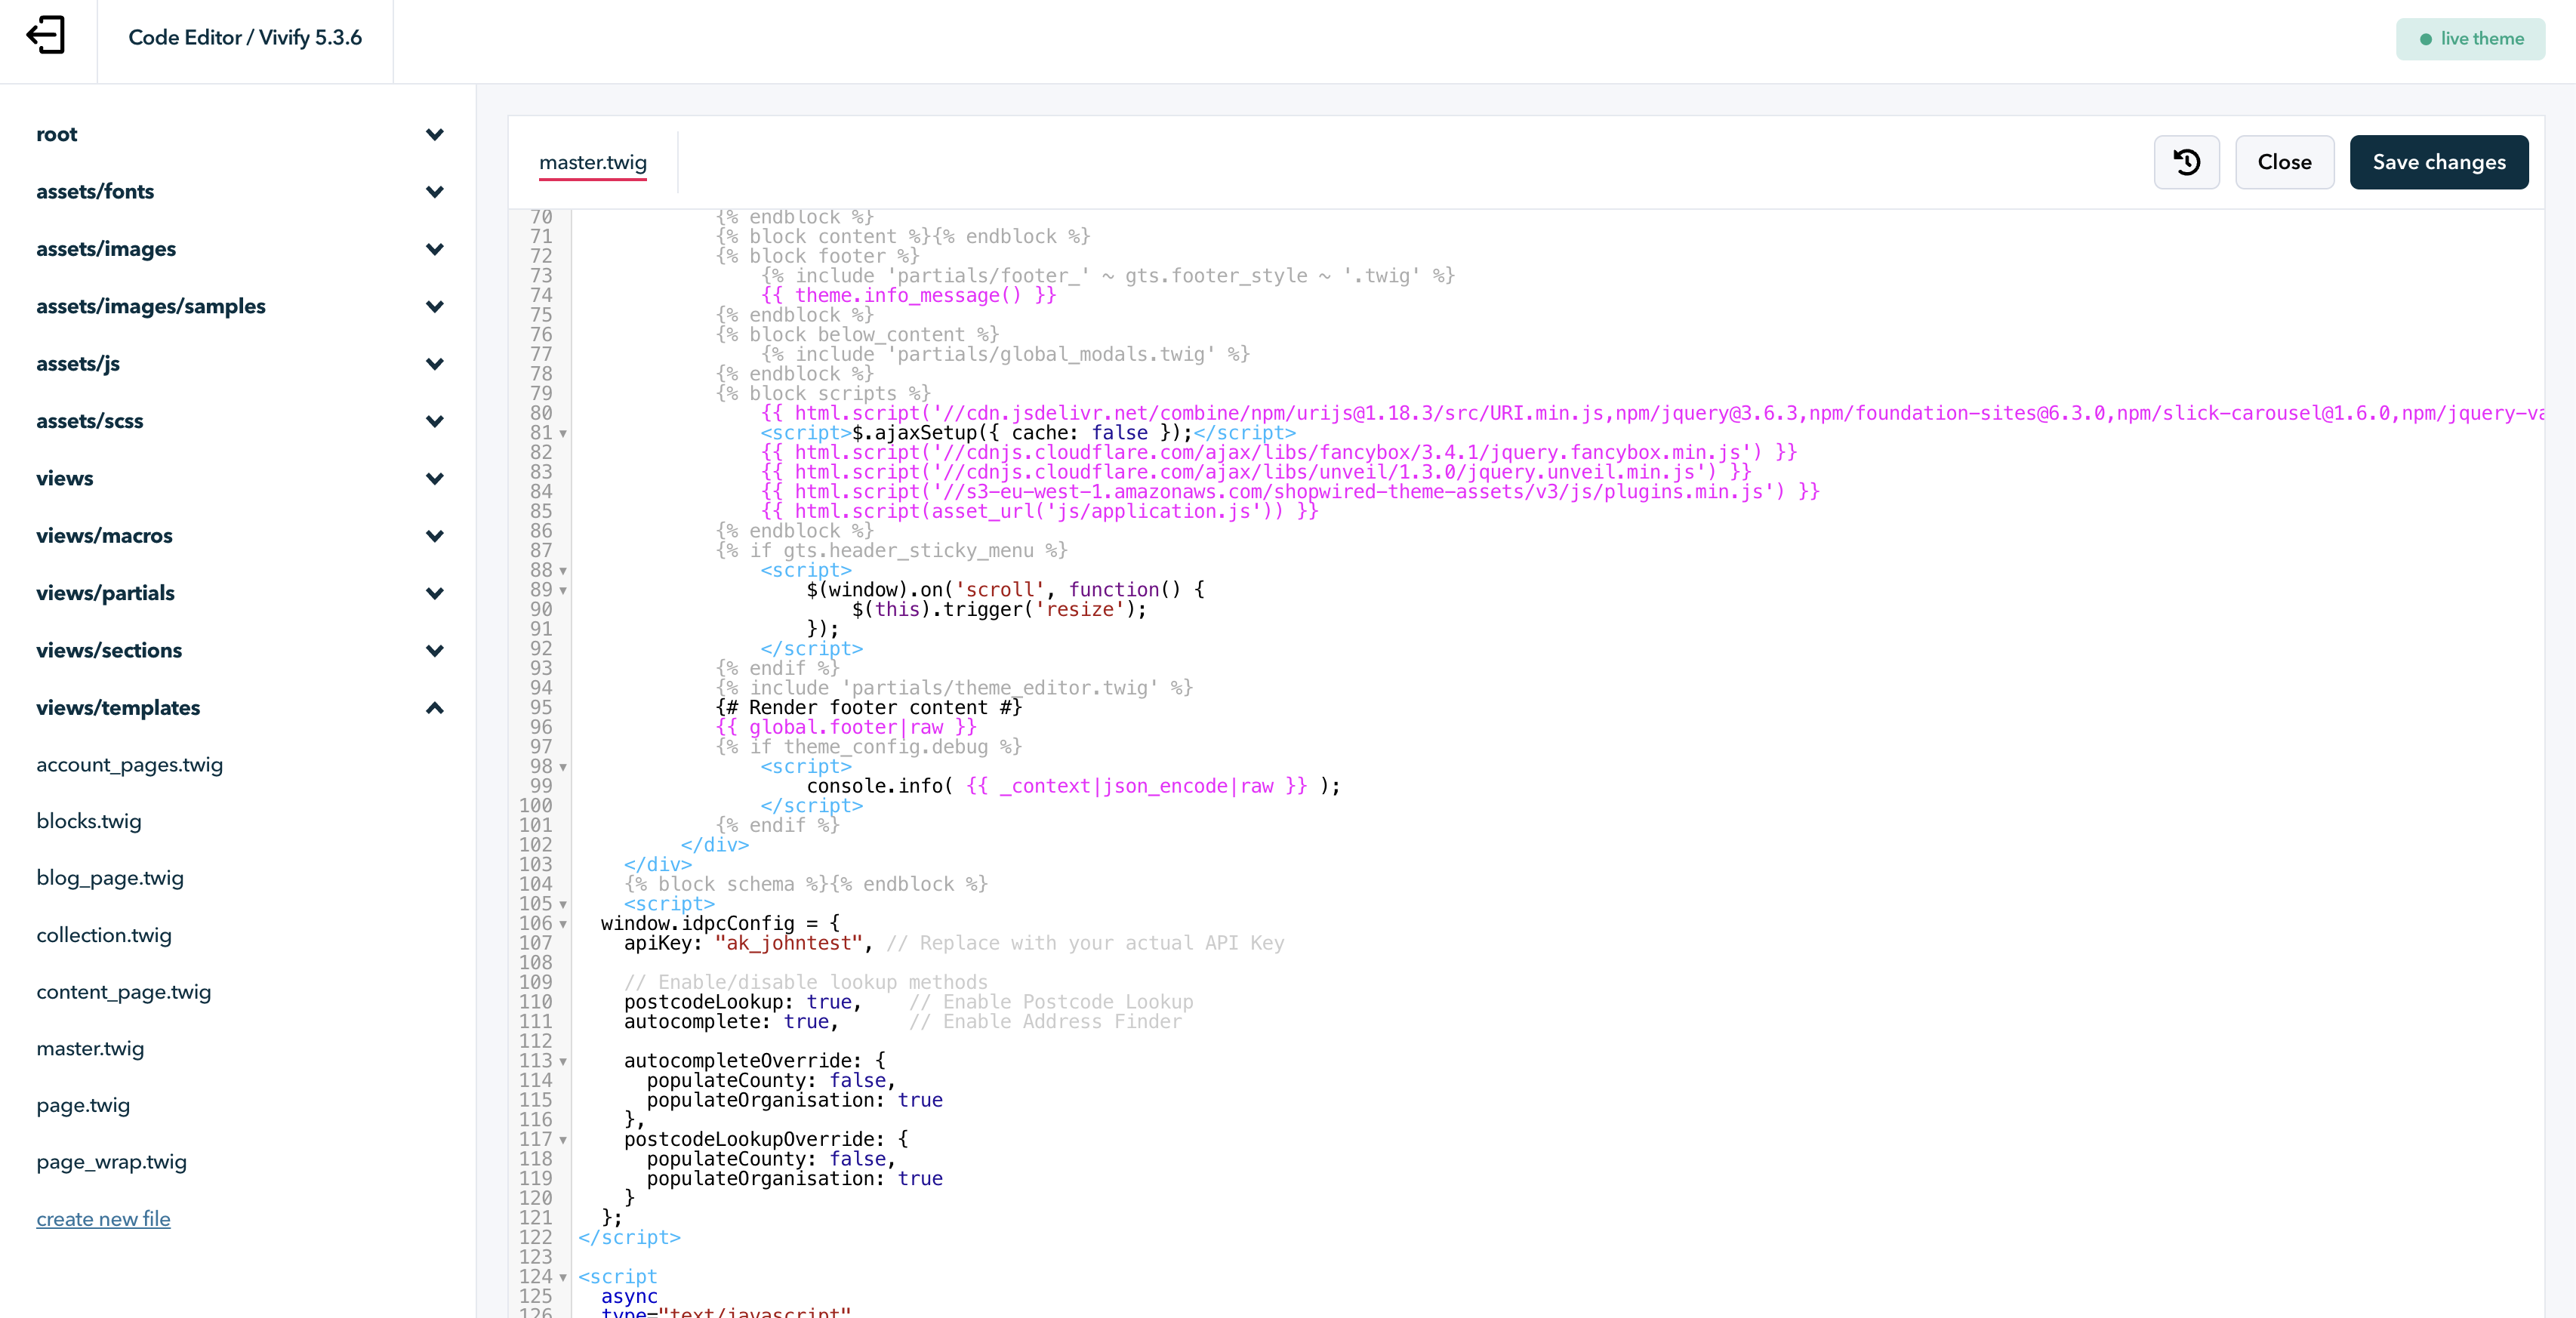
- Replace
ak_xxxxxxxxxxwith your actual API Key from Step 1 - Click Save
3. Configure Address Lookup Options (Optional)
By default, both Address Finder and Postcode Lookup are enabled. You can customise the behaviour by modifying the configuration in your script.
Default Configuration
The available configuration options are:
window.idpcConfig = {
	apiKey: "ak_xxxxxxxxxx", // Your API Key (required)

	// Enable/disable lookup methods
	postcodeLookup: true, // Enable Postcode Lookup
	autocomplete: true, // Enable Address Finder (autocomplete)

	// Advanced configuration (optional)
	autocompleteOverride: {
		populateOrganisation: true, // Auto-fill company name from address
		populateCounty: false, // Auto-fill county field (not recommended for UK)
	},
	postcodeLookupOverride: {
		populateOrganisation: true, // Auto-fill company name from address
		populateCounty: false, // Auto-fill county field (not recommended for UK)
	},
};
Configuration Options
| Setting | Type | Default | Description |
|---|---|---|---|
| apiKey | String | "" | Your Ideal Postcodes API Key (required) |
| postcodeLookup | Boolean | true | Enable traditional postcode lookup |
| autocomplete | Boolean | true | Enable Address Finder (type-ahead search) |
| populateOrganisation | Boolean | true | Auto-fill company name field from selected address |
| populateCounty | Boolean | false | Auto-fill county field (not recommended for UK) |
💡 Tip: Set postcodeLookup: false to use only Address Finder, or set autocomplete: false to use only Postcode Lookup.
4. Test the Integration
To verify the address validation is working:
- Go to your ShopWired checkout page
- Begin typing an address in the billing or shipping address field
- The Ideal Postcodes address lookup tool should automatically suggest addresses as you type
5. Advanced: Supported Forms and Field Selectors
When needed: For custom implementations or troubleshooting.
The integration automatically detects and binds to ShopWired address forms using these CSS selectors:
Billing Form
{
	"line_1": "[name=\"billing_address1\"]",
	"line_2": "[name=\"billing_address2\"]",
	"line_3": "[name=\"billing_address3\"]",
	"post_town": "[name=\"billing_city\"]",
	"postcode": "[name=\"billing_postcode\"]",
	"country": "[name=\"billing_country_id\"]"
}
Shipping Form
{
	"line_1": "[name=\"shipping_address1\"]",
	"line_2": "[name=\"shipping_address2\"]",
	"line_3": "[name=\"shipping_address3\"]",
	"post_town": "[name=\"shipping_city\"]",
	"postcode": "[name=\"shipping_postcode\"]",
	"country": "[name=\"shipping_country_id\"]"
}
Customer Form
{
	"line_1": "[name=\"address_line1\"]",
	"line_2": "[name=\"address_line2\"]",
	"line_3": "[name=\"address_line3\"]",
	"post_town": "[name=\"city\"]",
	"postcode": "[name=\"postcode\"]",
	"country": "[name=\"country_id\"]"
}
Billing Edit Form
{
	"line_1": "[name=\"billing_address_line1\"]",
	"line_2": "[name=\"billing_address_line2\"]",
	"line_3": "[name=\"billing_address_line3\"]",
	"post_town": "[name=\"billing_city\"]",
	"postcode": "[name=\"billing_postcode\"]",
	"country": "[name=\"billing_country_id\"]"
}
Shipping Edit Form
{
	"line_1": "[name=\"shipping_address_line1\"]",
	"line_2": "[name=\"shipping_address_line2\"]",
	"line_3": "[name=\"shipping_address_line3\"]",
	"post_town": "[name=\"shipping_city\"]",
	"postcode": "[name=\"shipping_postcode\"]",
	"country": "[name=\"shipping_country_id\"]"
}
6. Version Management
Automatic Updates
The integration automatically updates to the latest version using the version suffix in the script URL. This ensures you always have the latest features and bug fixes.
Version Pinning (Optional)
When to use: If you need to lock to a specific version for stability.
The current version in the examples is @3.0.2. You can pin to a specific version by keeping this exact version number, or update it to a newer version as they become available.
All versions are tracked in our Changelog.
7. Admin Dashboard Integration (Optional)
When needed: If you want address validation in your ShopWired admin panel.
To enable address validation on admin pages, install our Browser Extension. This adds address lookup functionality to order management and customer address forms in your admin dashboard.
8. Troubleshooting
| Issue | Solution |
|---|---|
| No address suggestions appear | • Verify API Key is correct in your script • Check key balance in your account dashboard • Ensure country is set to UK territory • Check browser console (F12) for errors |
| Script not loading | • Verify script is saved in Advanced Customisation or master.twig • Clear browser cache and test in incognito mode • Check for JavaScript errors in console |
| Works on checkout but not account pages | • Install via Method B (master.twig) for account page support • Verify script is placed before </body> tag |
| Address fields not populating | • Check that field selectors match your theme • Verify custom theme hasn't changed default field names • Review browser console for JavaScript errors |
Need help? Contact our support team via live chat on our website or email support@ideal-postcodes.co.uk.