Integrate Address Validation to Your FormAssembly Pages.
Features
- Bind address autocompletion to your address fields
- Add one or more postcode lookup fields
Screenshots
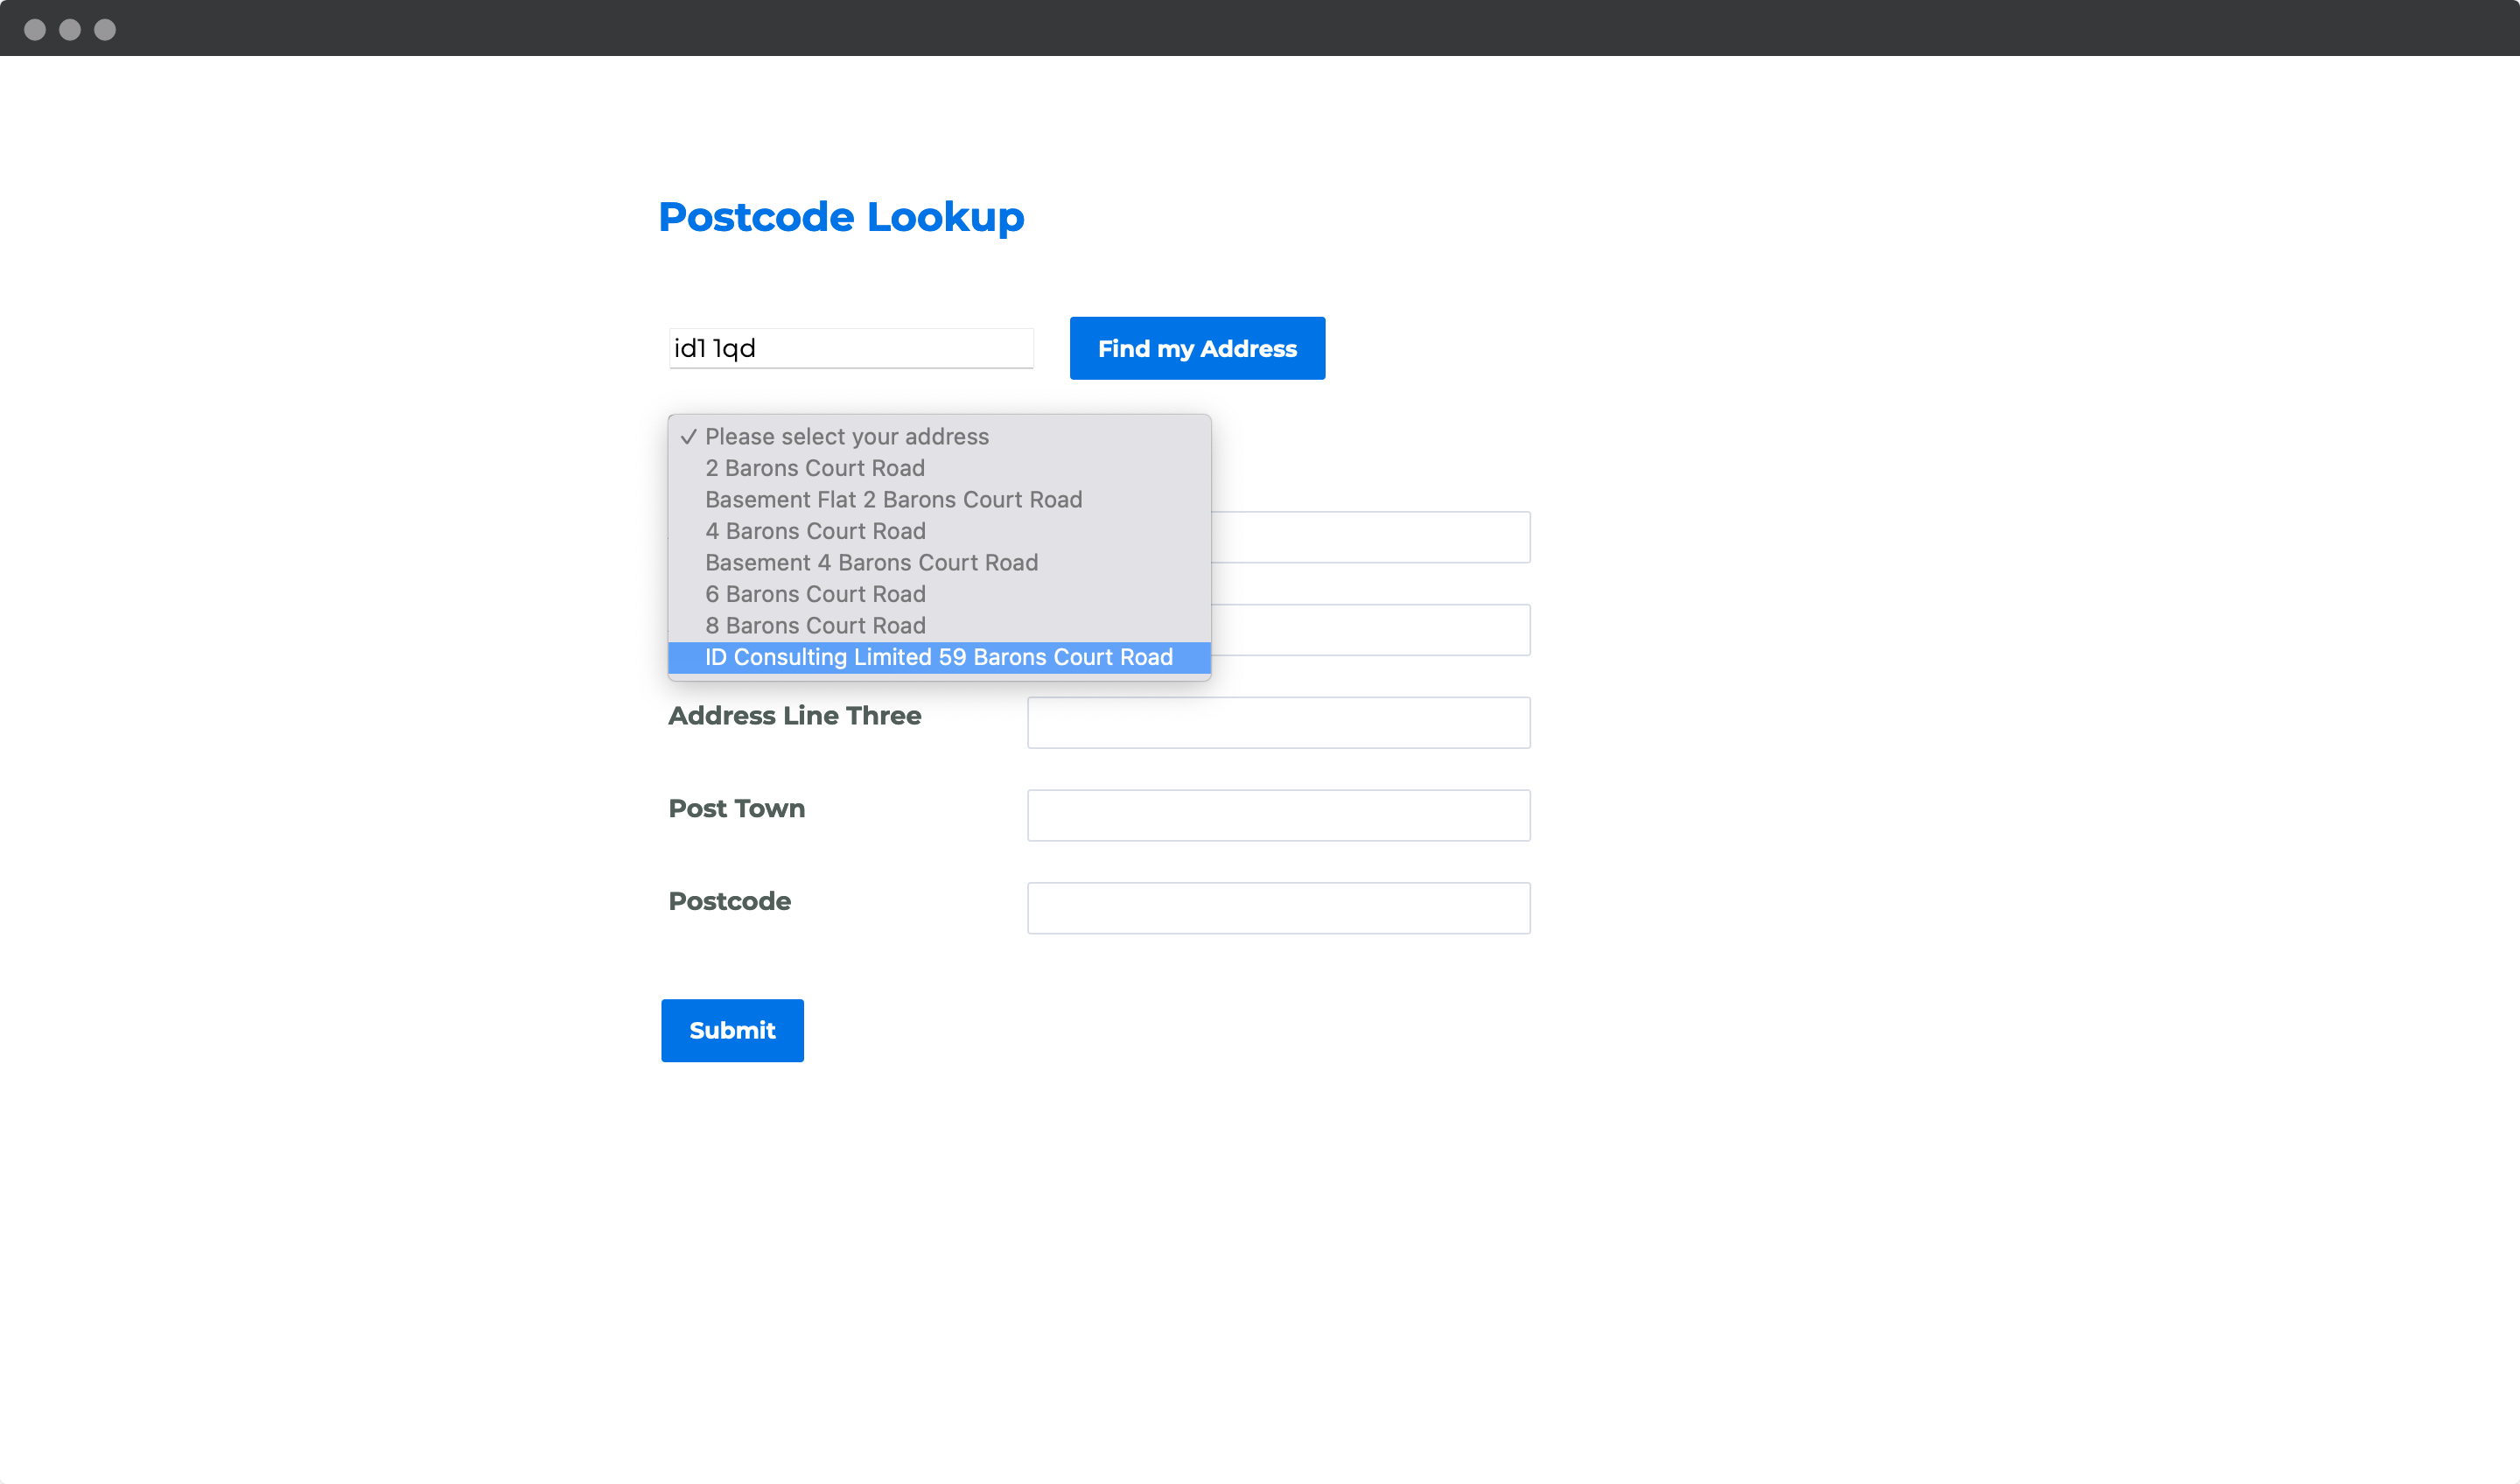
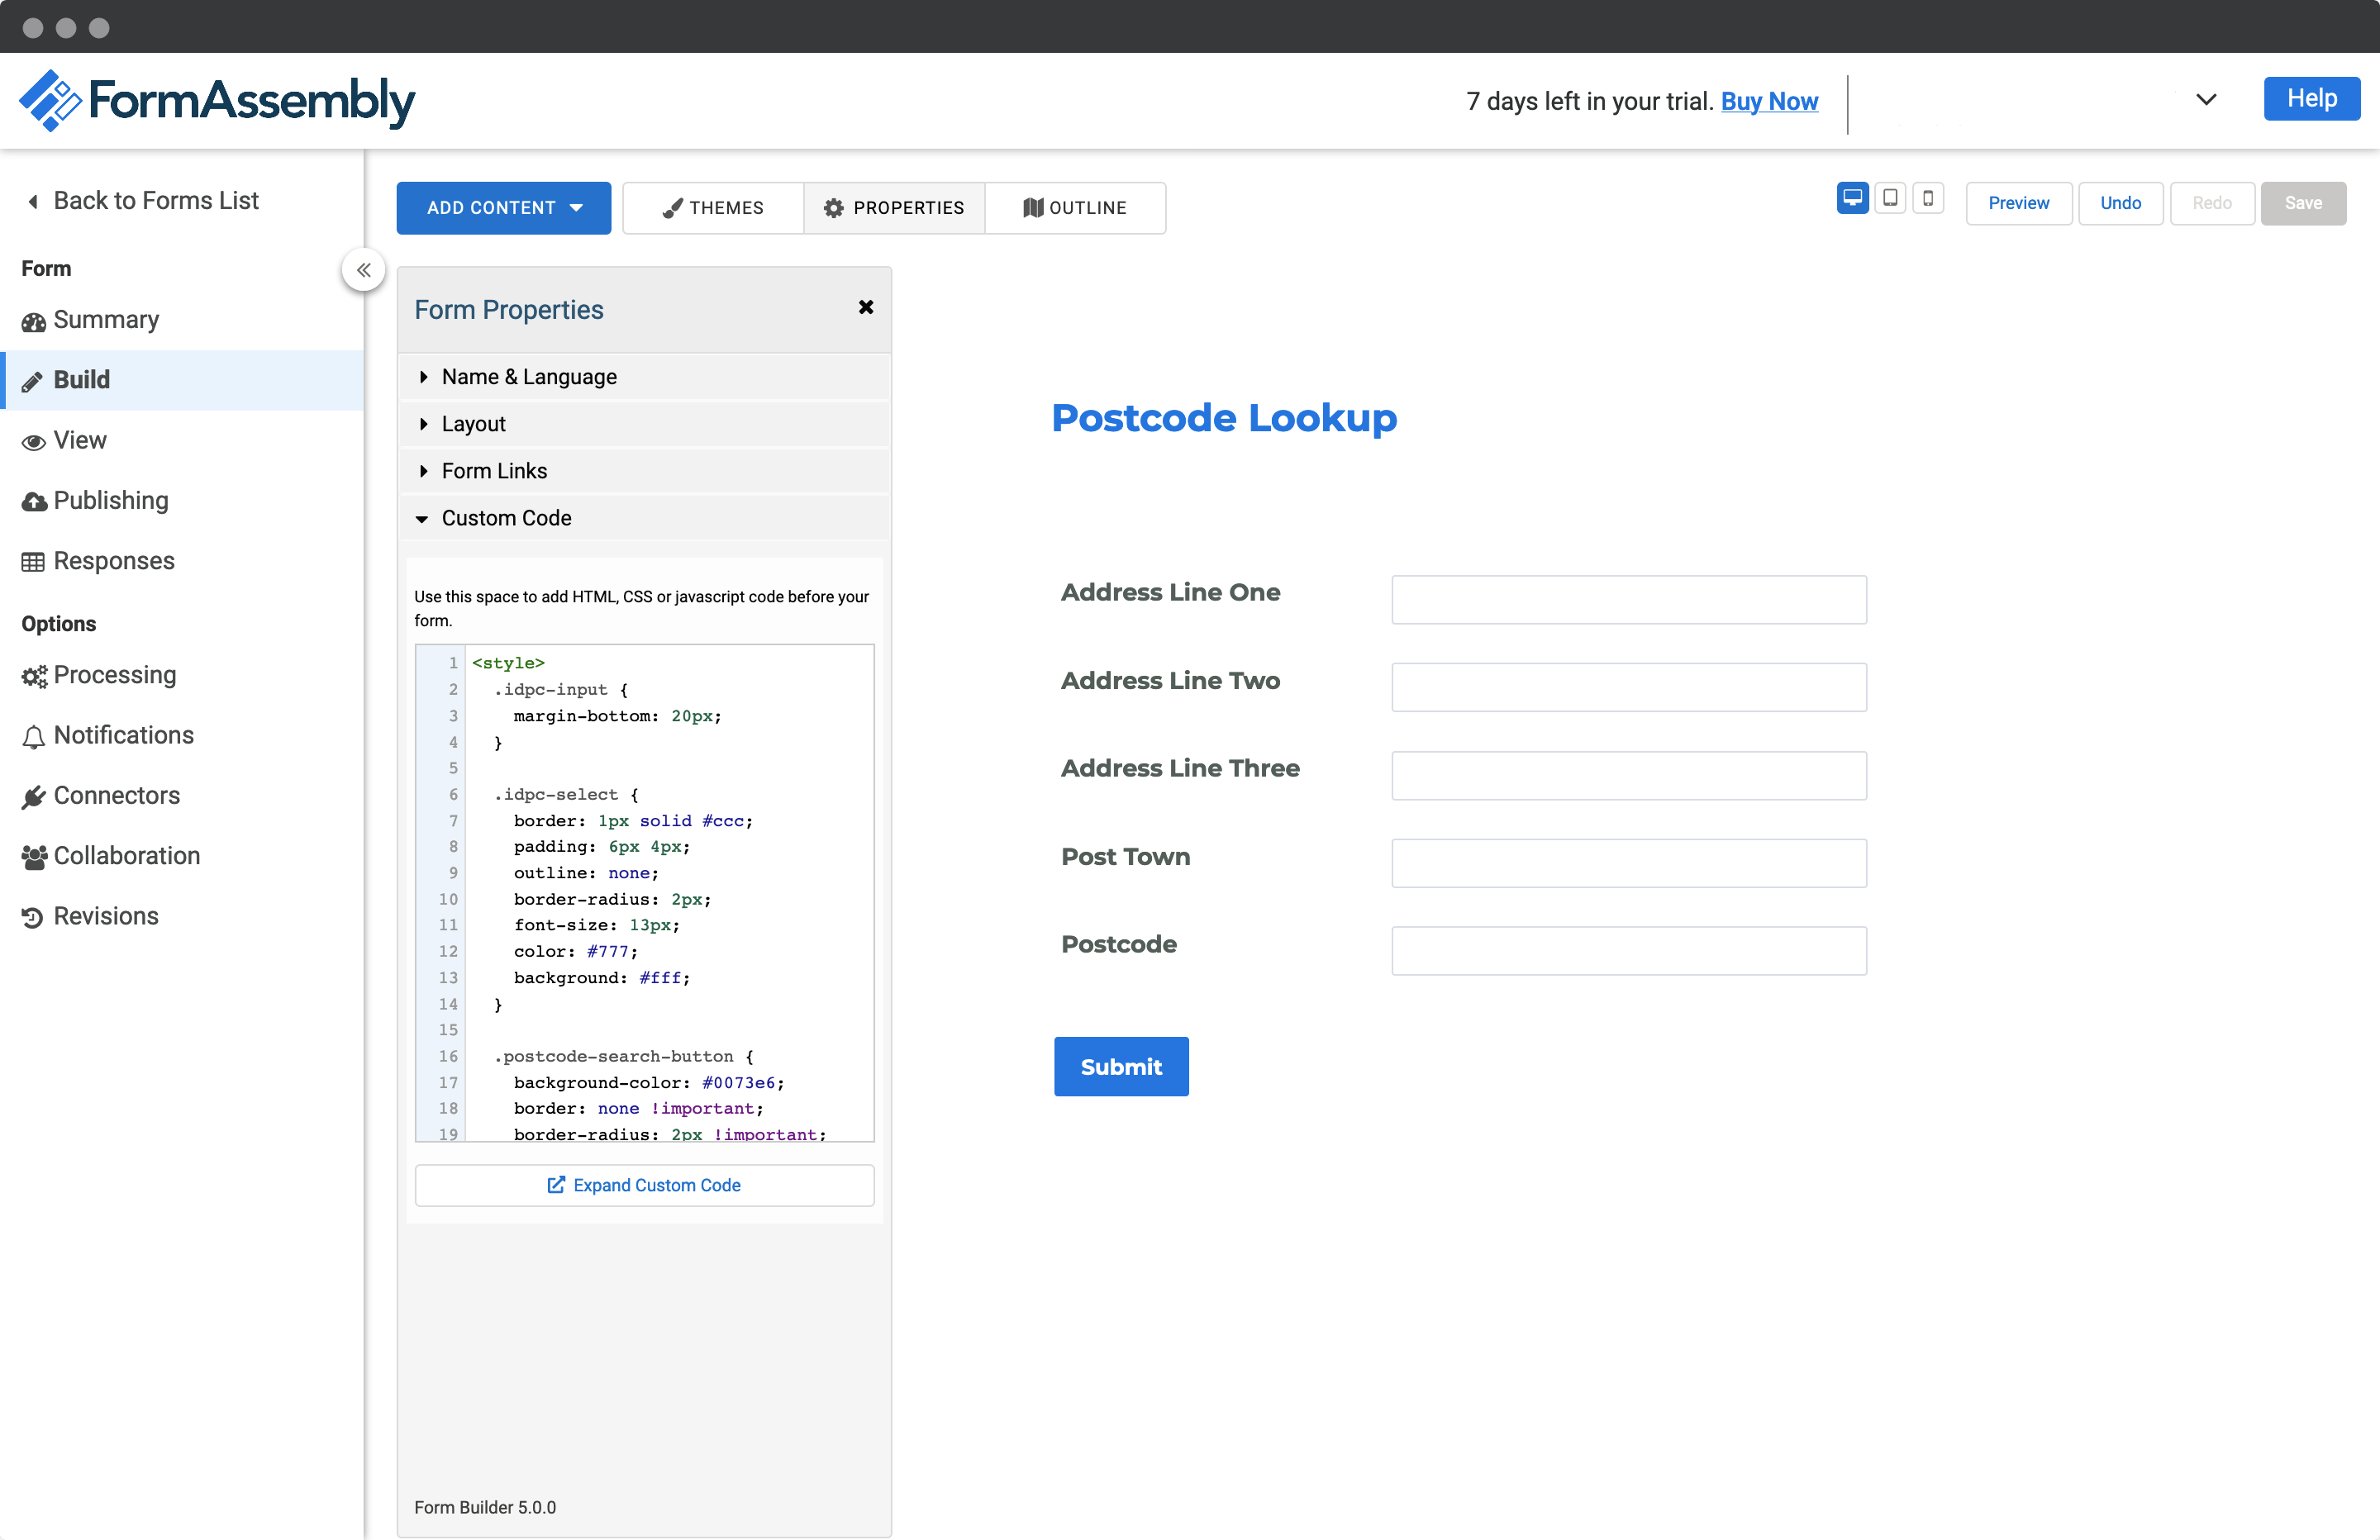
Postcode Lookup
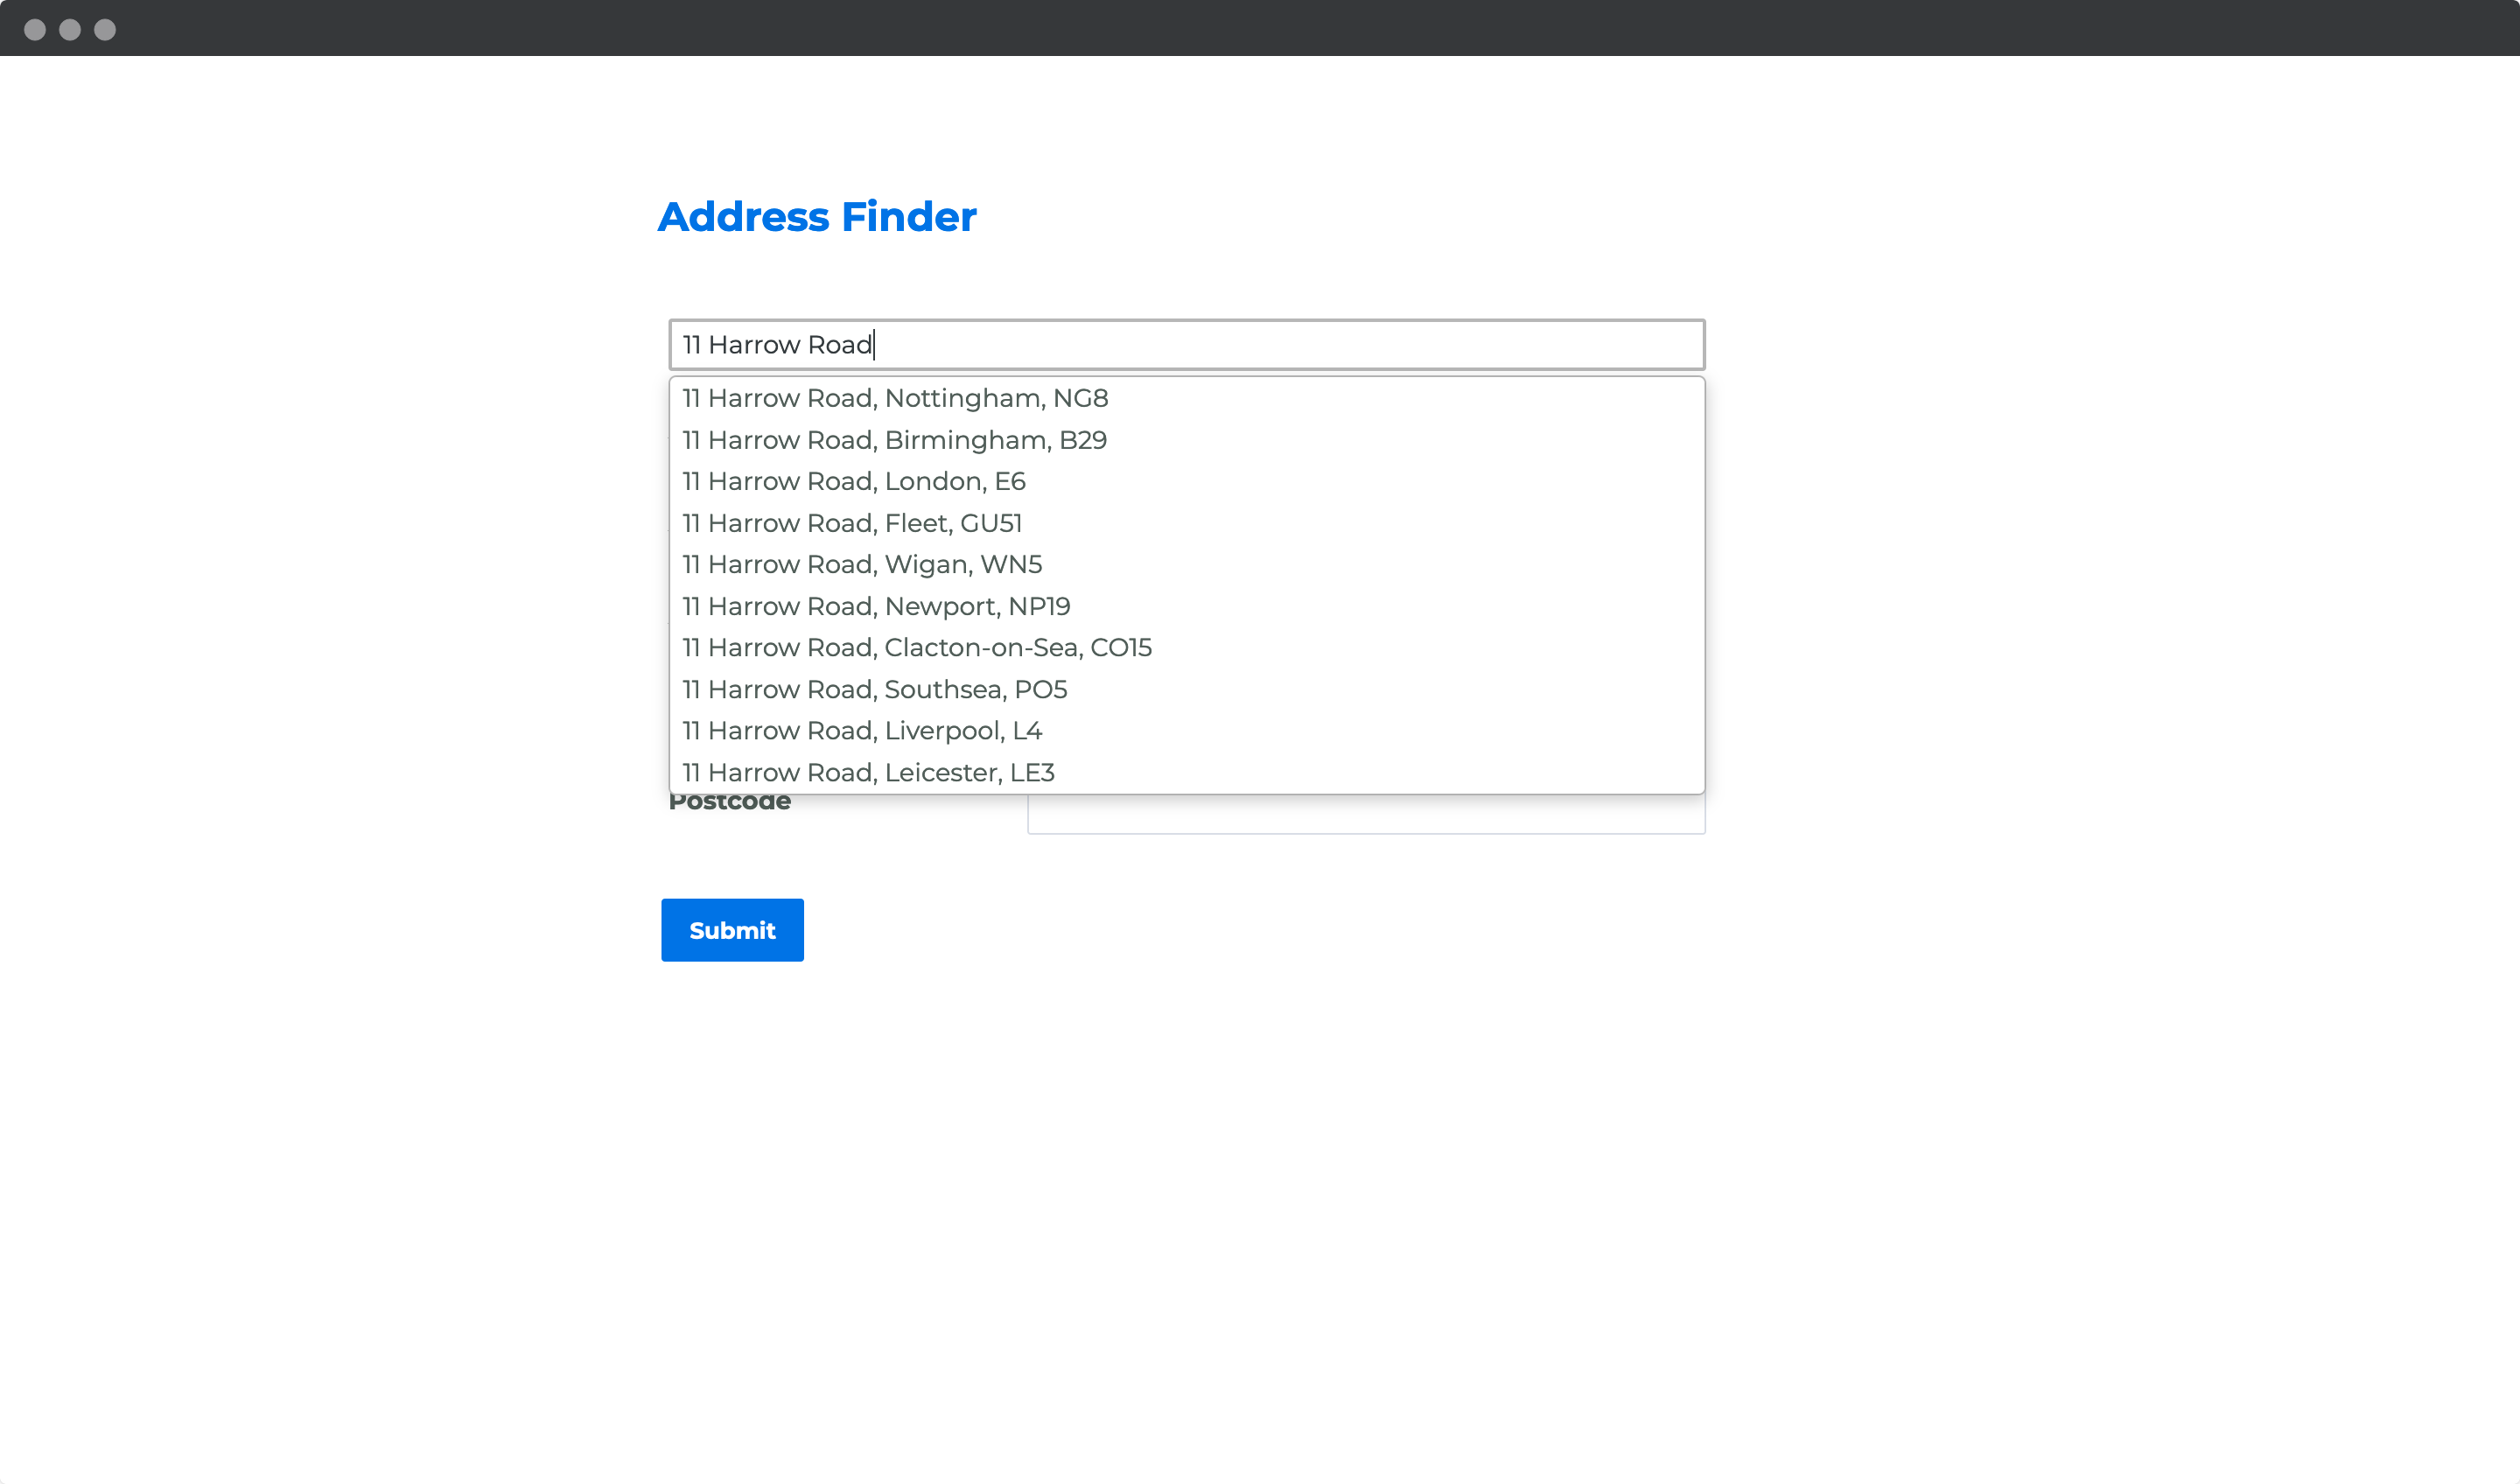
Address Finder��
Installation
This integration works by adding our Address Finder tool using FormAssembly's custom code feature.
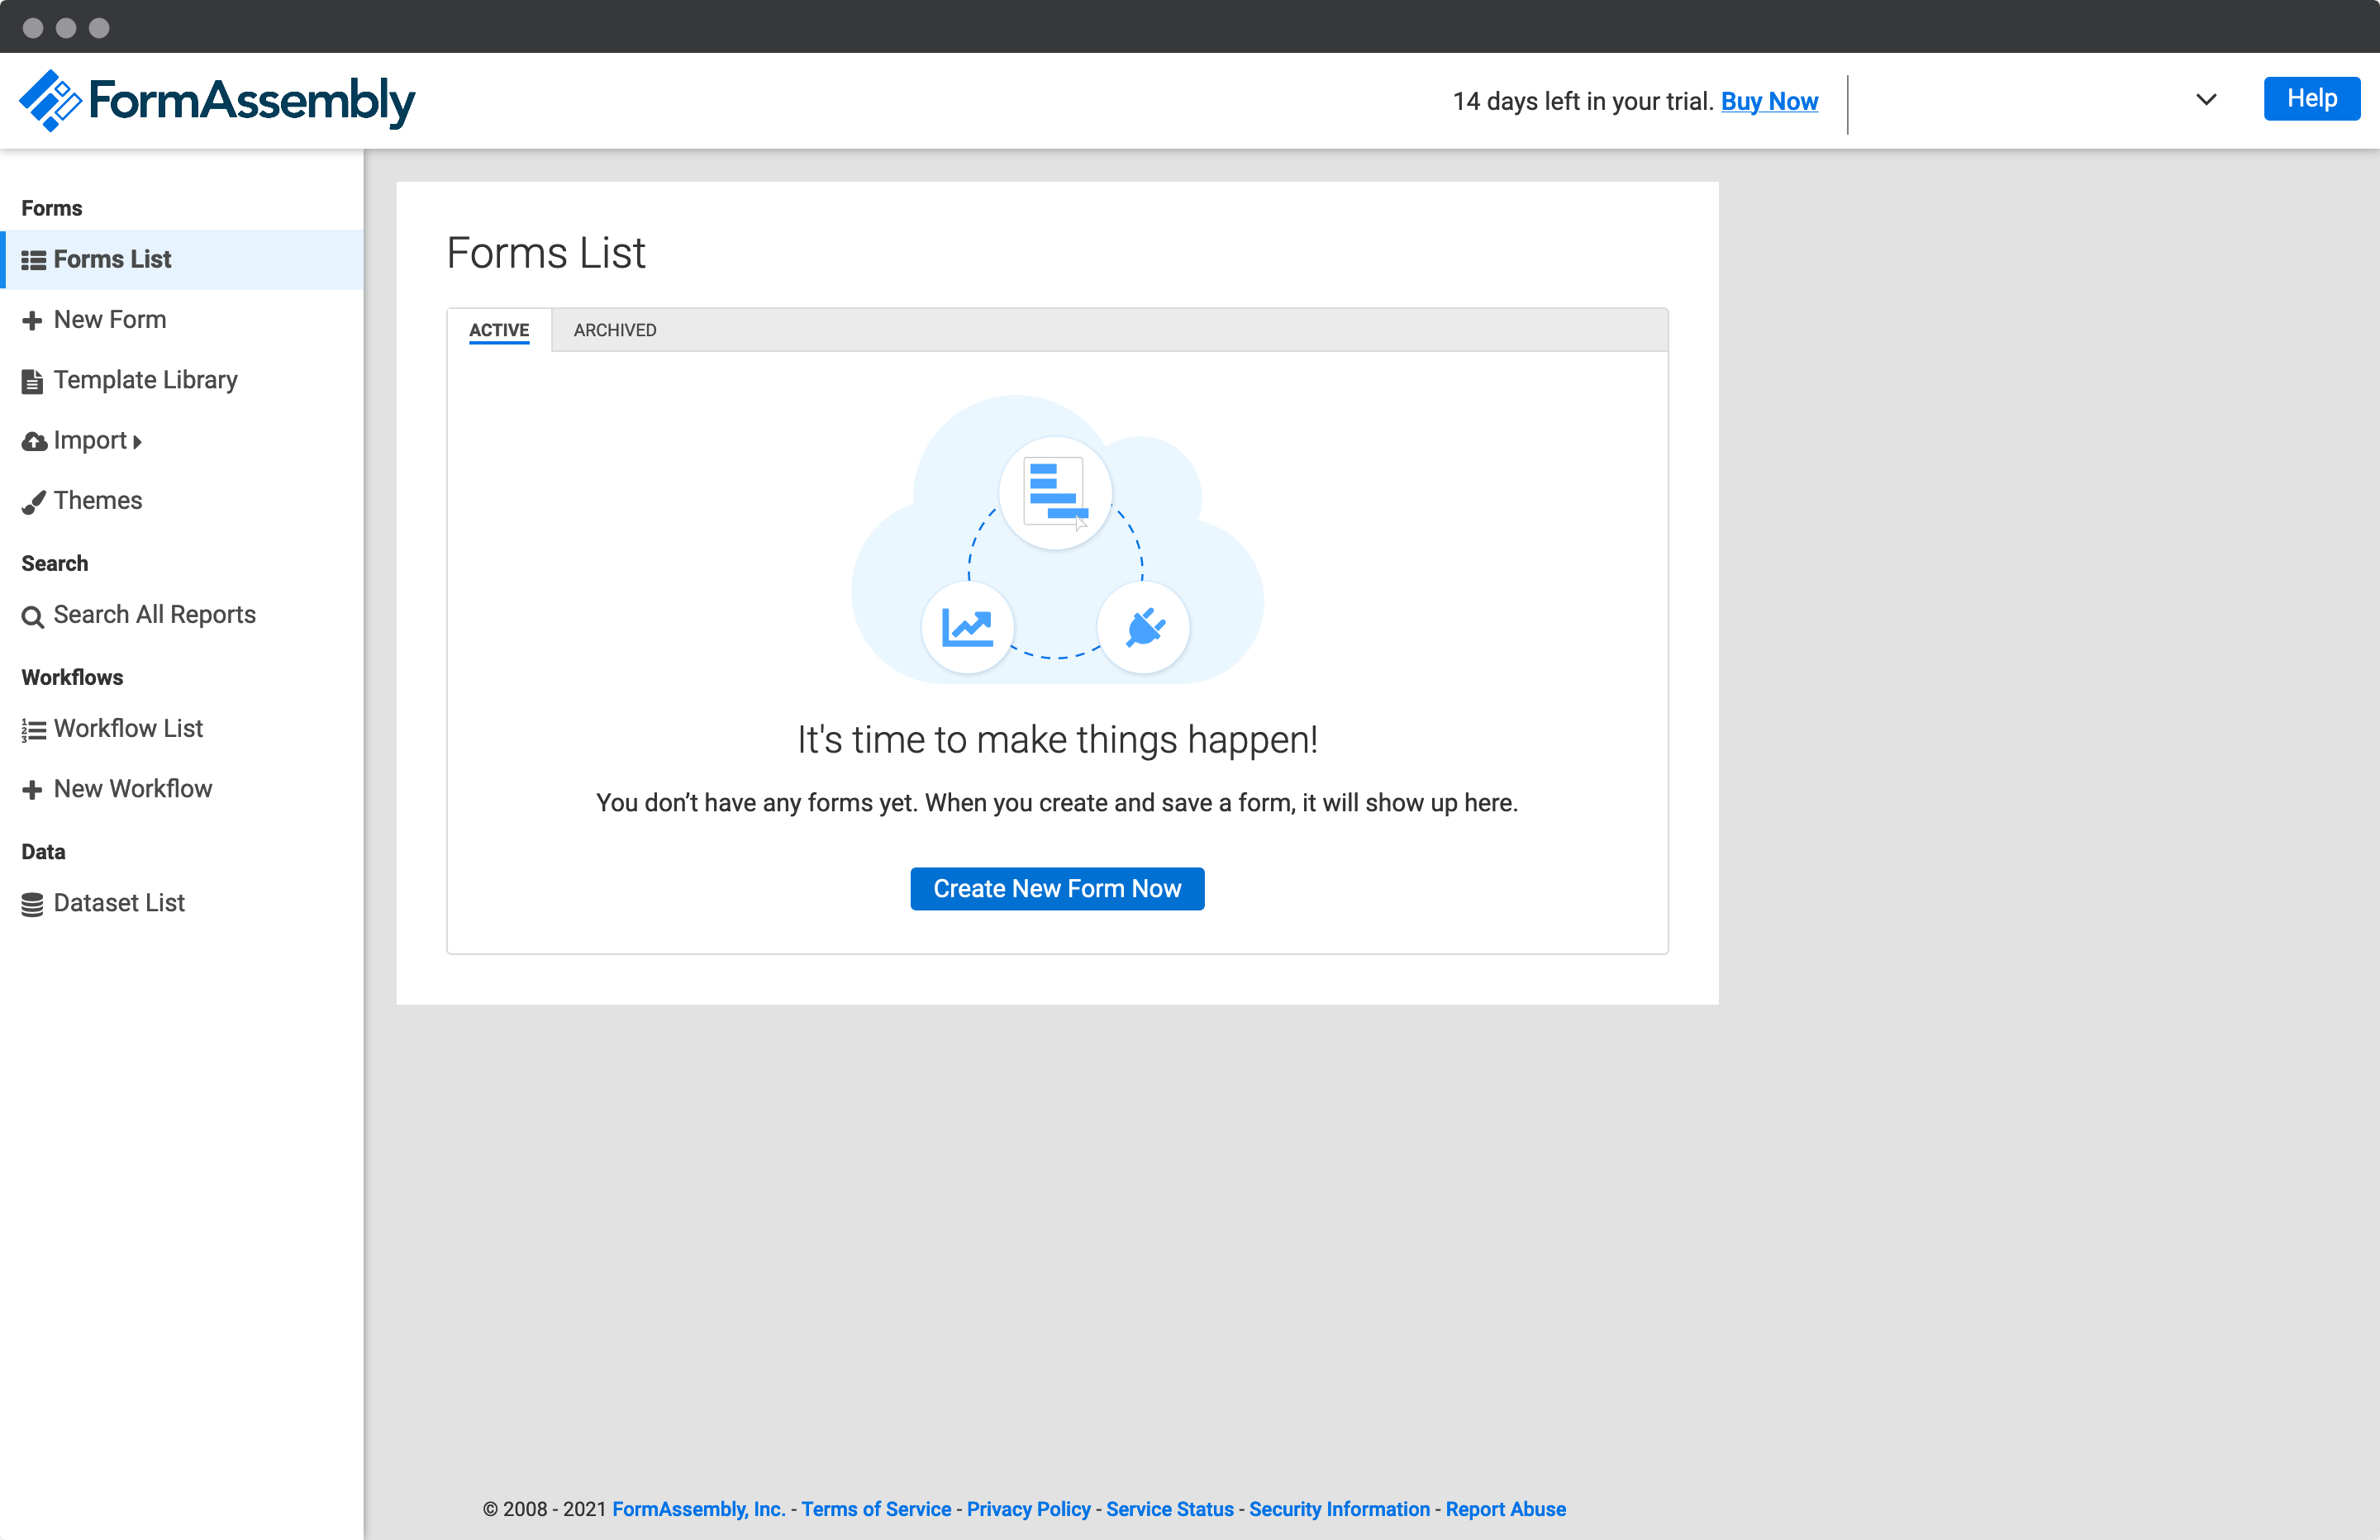
Create Address Fields
On your form, firstly add an Address Finder Field. You can do this by creating an text input field and then updating the input label and/or placeholder to something like Start typing to find your address.
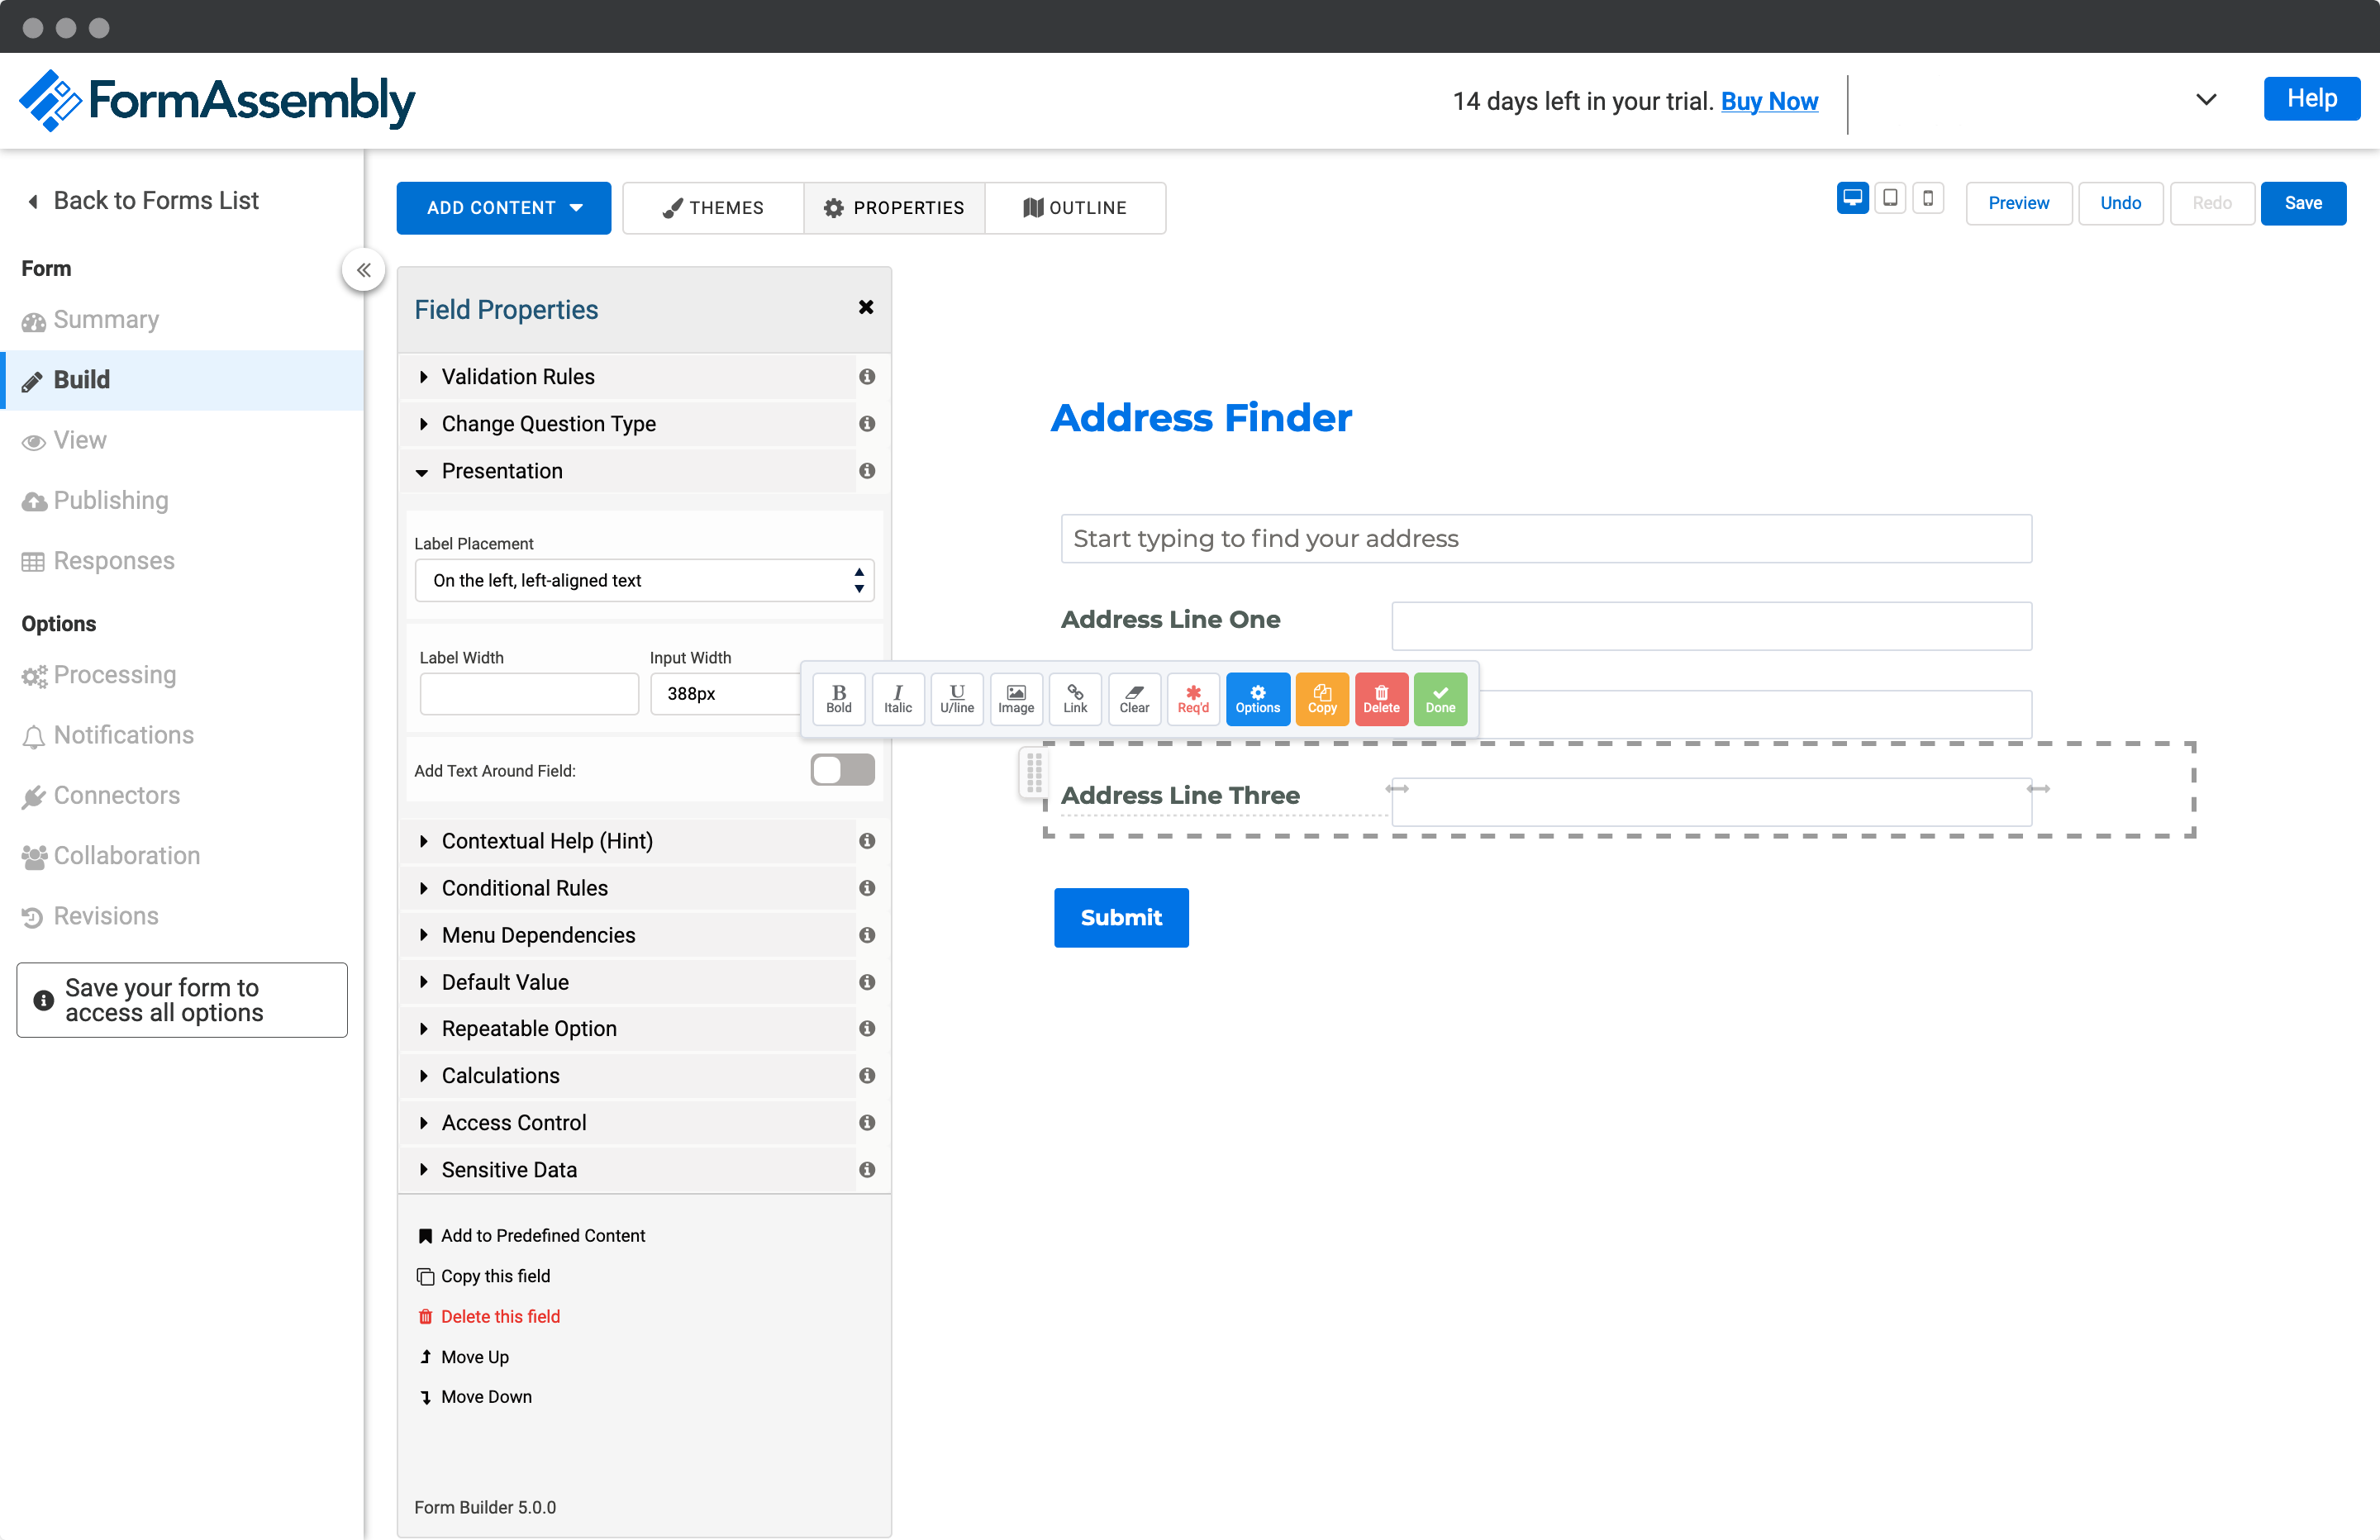
Next, create your Address inputs beneath. We recommend the following address structure to correctly capture UK addresses:
- Address line one (required)
- Address line two
- Address line three
- Post town (required)
- Postcode (required)
Add Address Finder
Install and Initialise Plugin
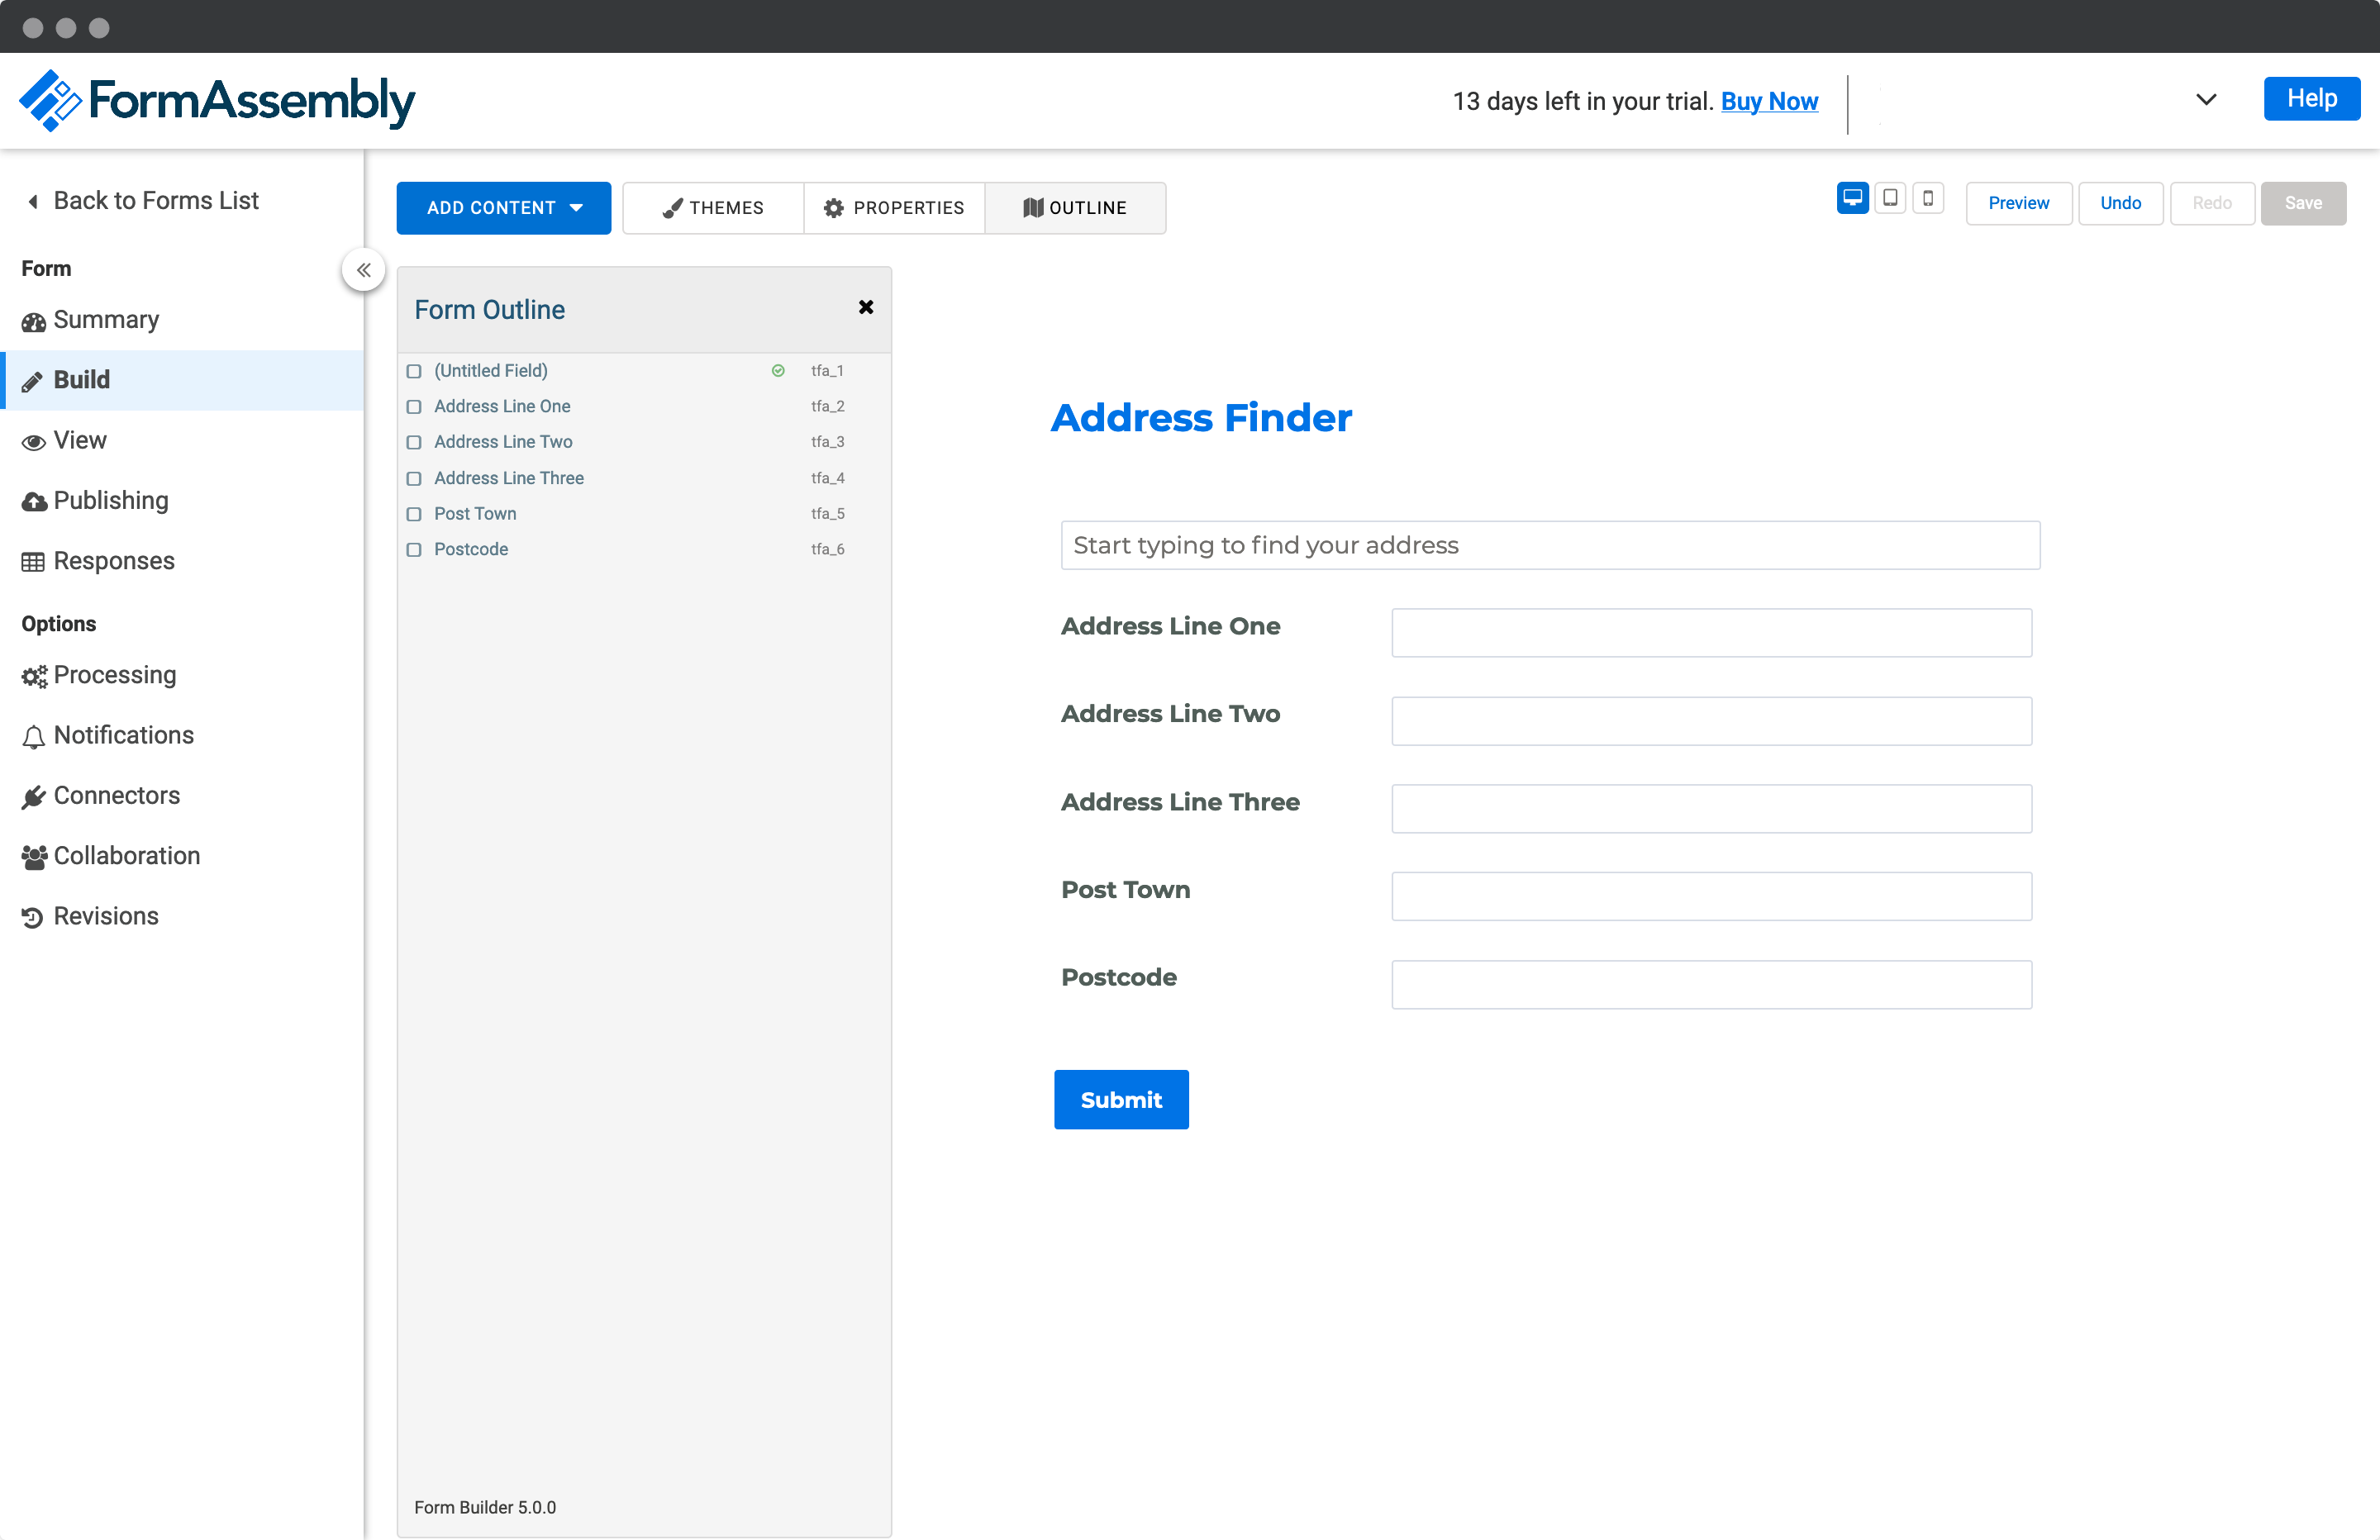
When your form is complete, make a note of the field names of your Address Finder Field and your address fields. This is the grey text in the Form Outline box, you will need it to direct your user's selected address to the right fields.
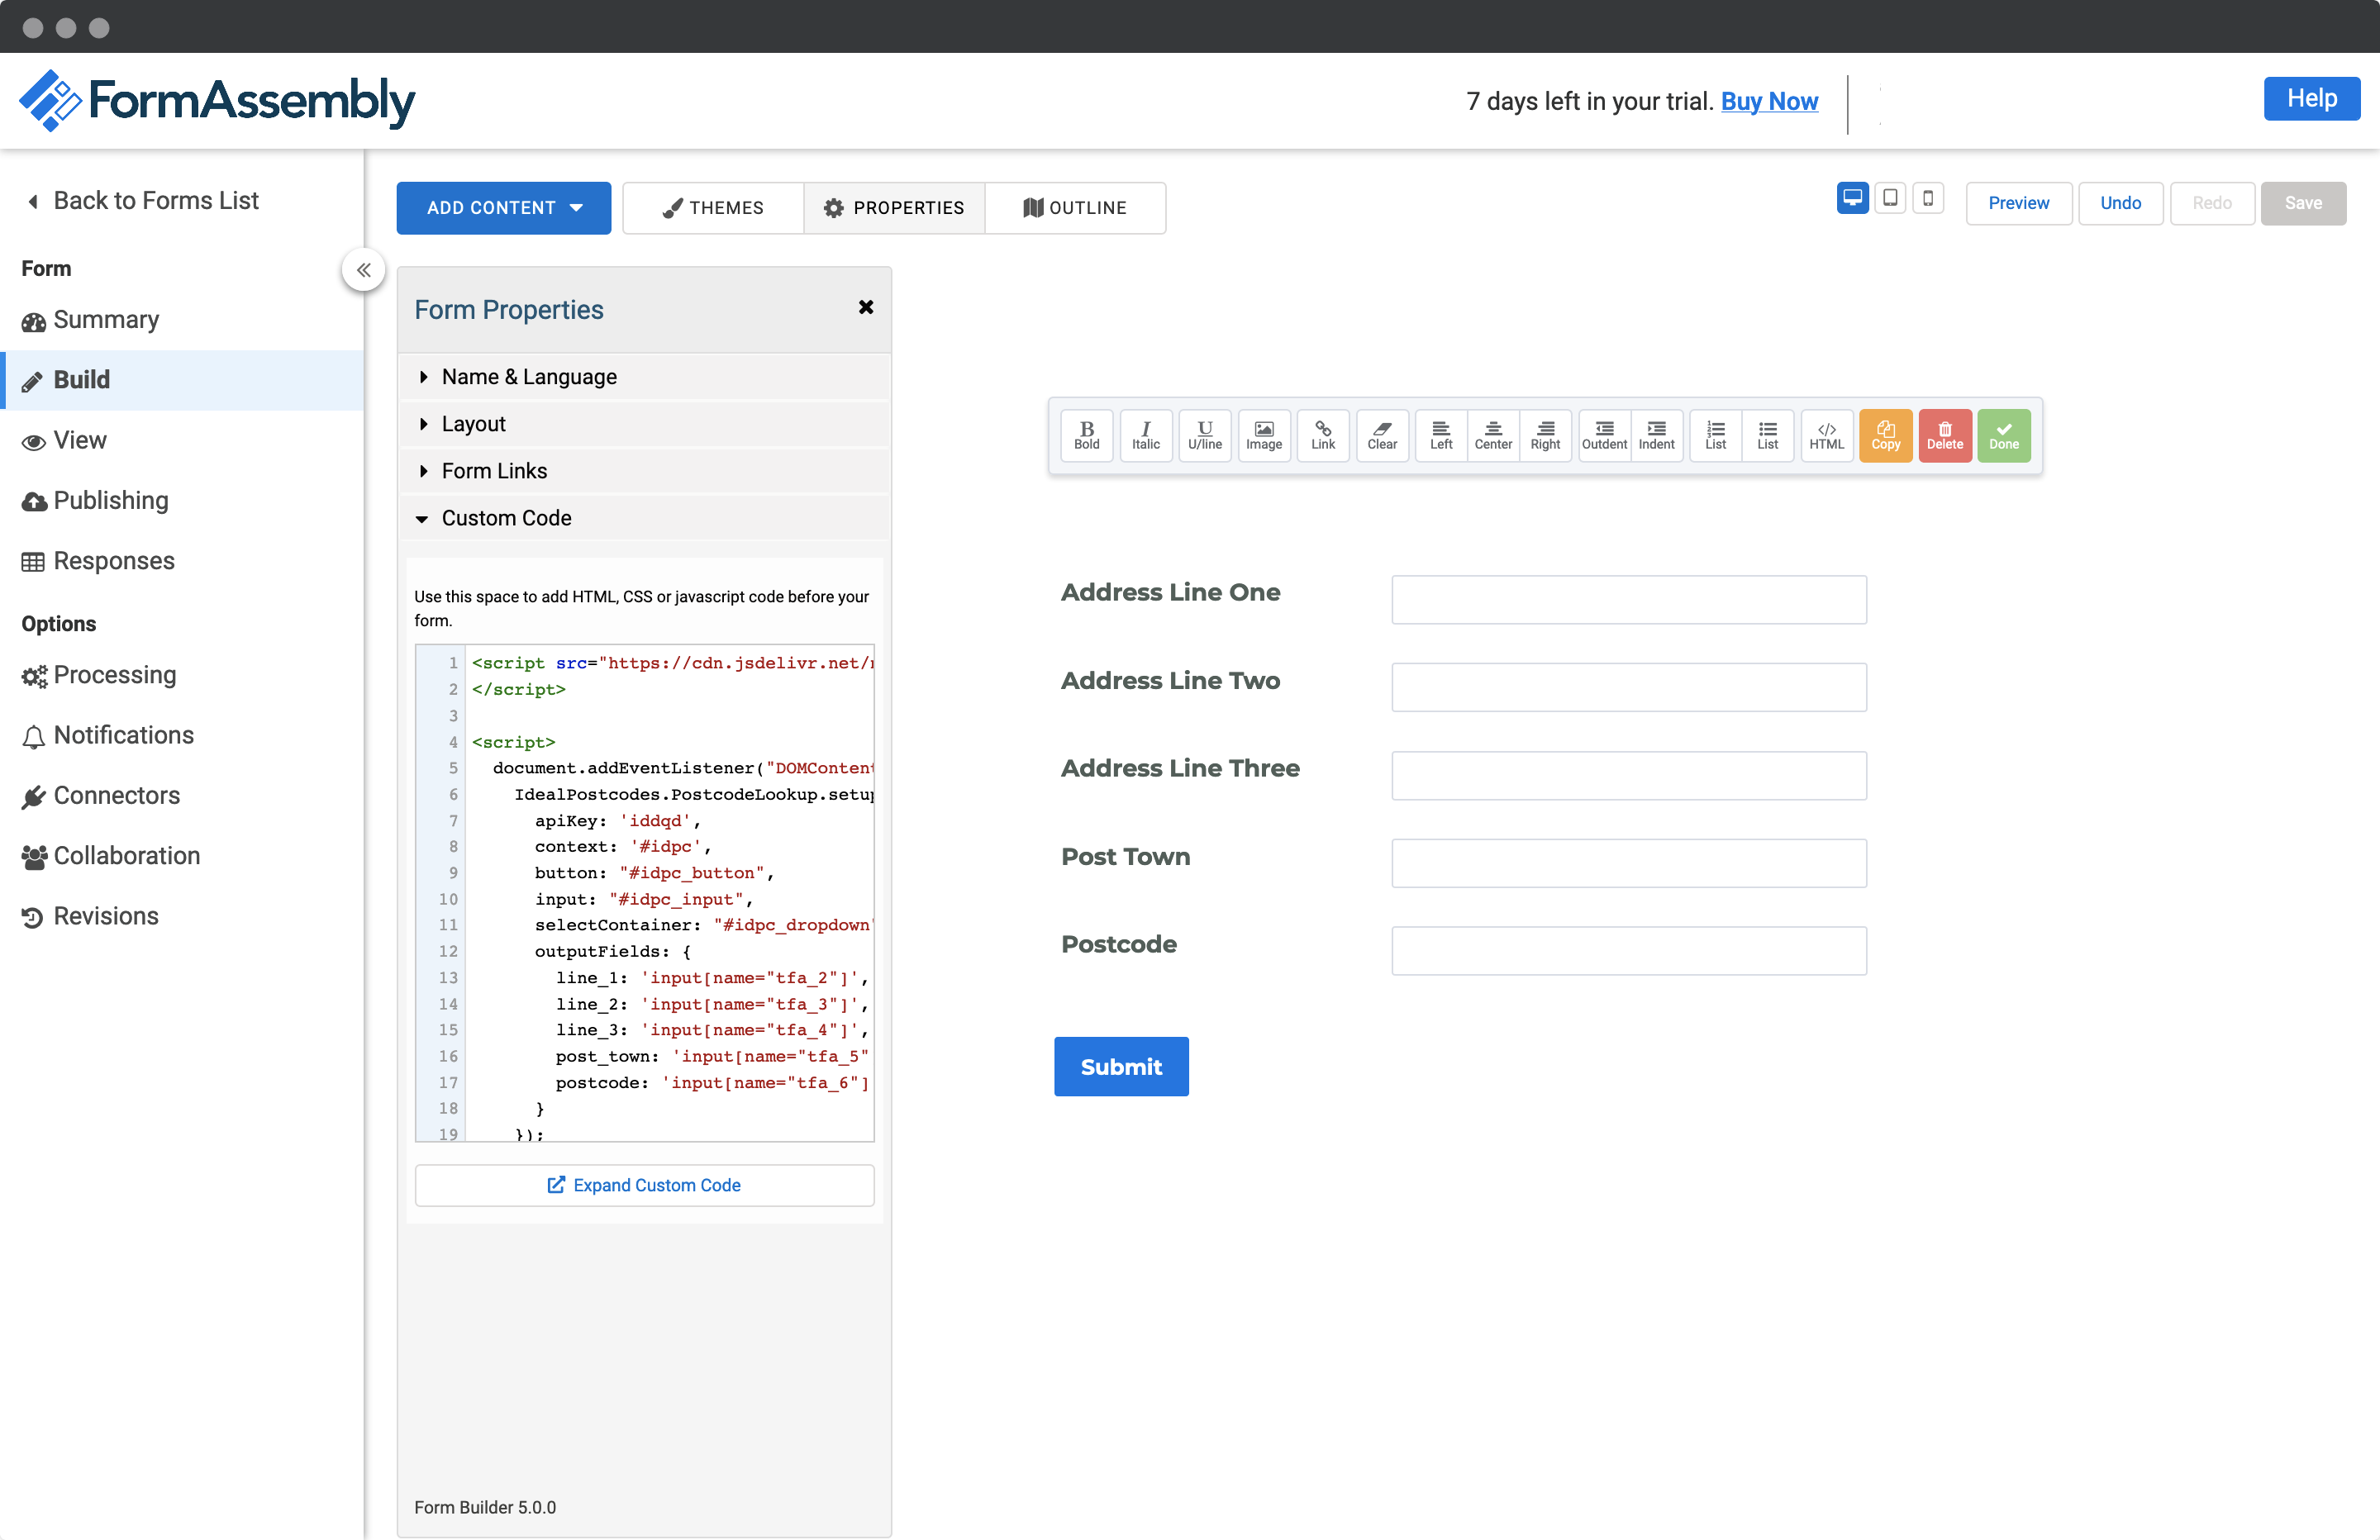
Add our JavaScript library to your page with Custom Code. Click the Properties option on the top of the page. Next, in the Form Properties panel, click on Custom Code.
Add and adapt the following to load the plugin and then to initialise it.
<script src="https://cdn.jsdelivr.net/npm/@ideal-postcodes/address-finder-bundled"></script>

<script>
	document.addEventListener("DOMContentLoaded", function () {
		IdealPostcodes.AddressFinder.setup({
			apiKey: "YOUR_API_KEY",
			inputField: 'input[name="tfa_1"]',
			outputFields: {
				line_1: 'input[name="tfa_2"]',
				line_2: 'input[name="tfa_3"]',
				line_3: 'input[name="tfa_4"]',
				post_town: 'input[name="tfa_5"]',
				postcode: 'input[name="tfa_6"]',
			},
		});
	});
</script>
Take special care to:
- Insert your API Key in the
apiKeyfield - Match the names of your target fields. You can verify this on the 'Form Outline' panel. If the field name for Address Line One is
tfa_2,line_1:should read'input[name="tfa_2"]'.
If you wish to add an additional field, include the parameter name from our documentation. For instance, adding a county field with name county will look like:
outputFields: {
  line_1: 'input[name="tfa_2]',
  line_2: 'input[name="tfa_3"]',
  line_3: 'input[name="tfa_4"]',
  post_town: 'input[name="tfa_5"]',
  county: 'input[name="tfa_6"]',
  postcode: 'input[name="tfa_7"]'
}
Add Postcode Lookup
Add HTML Element
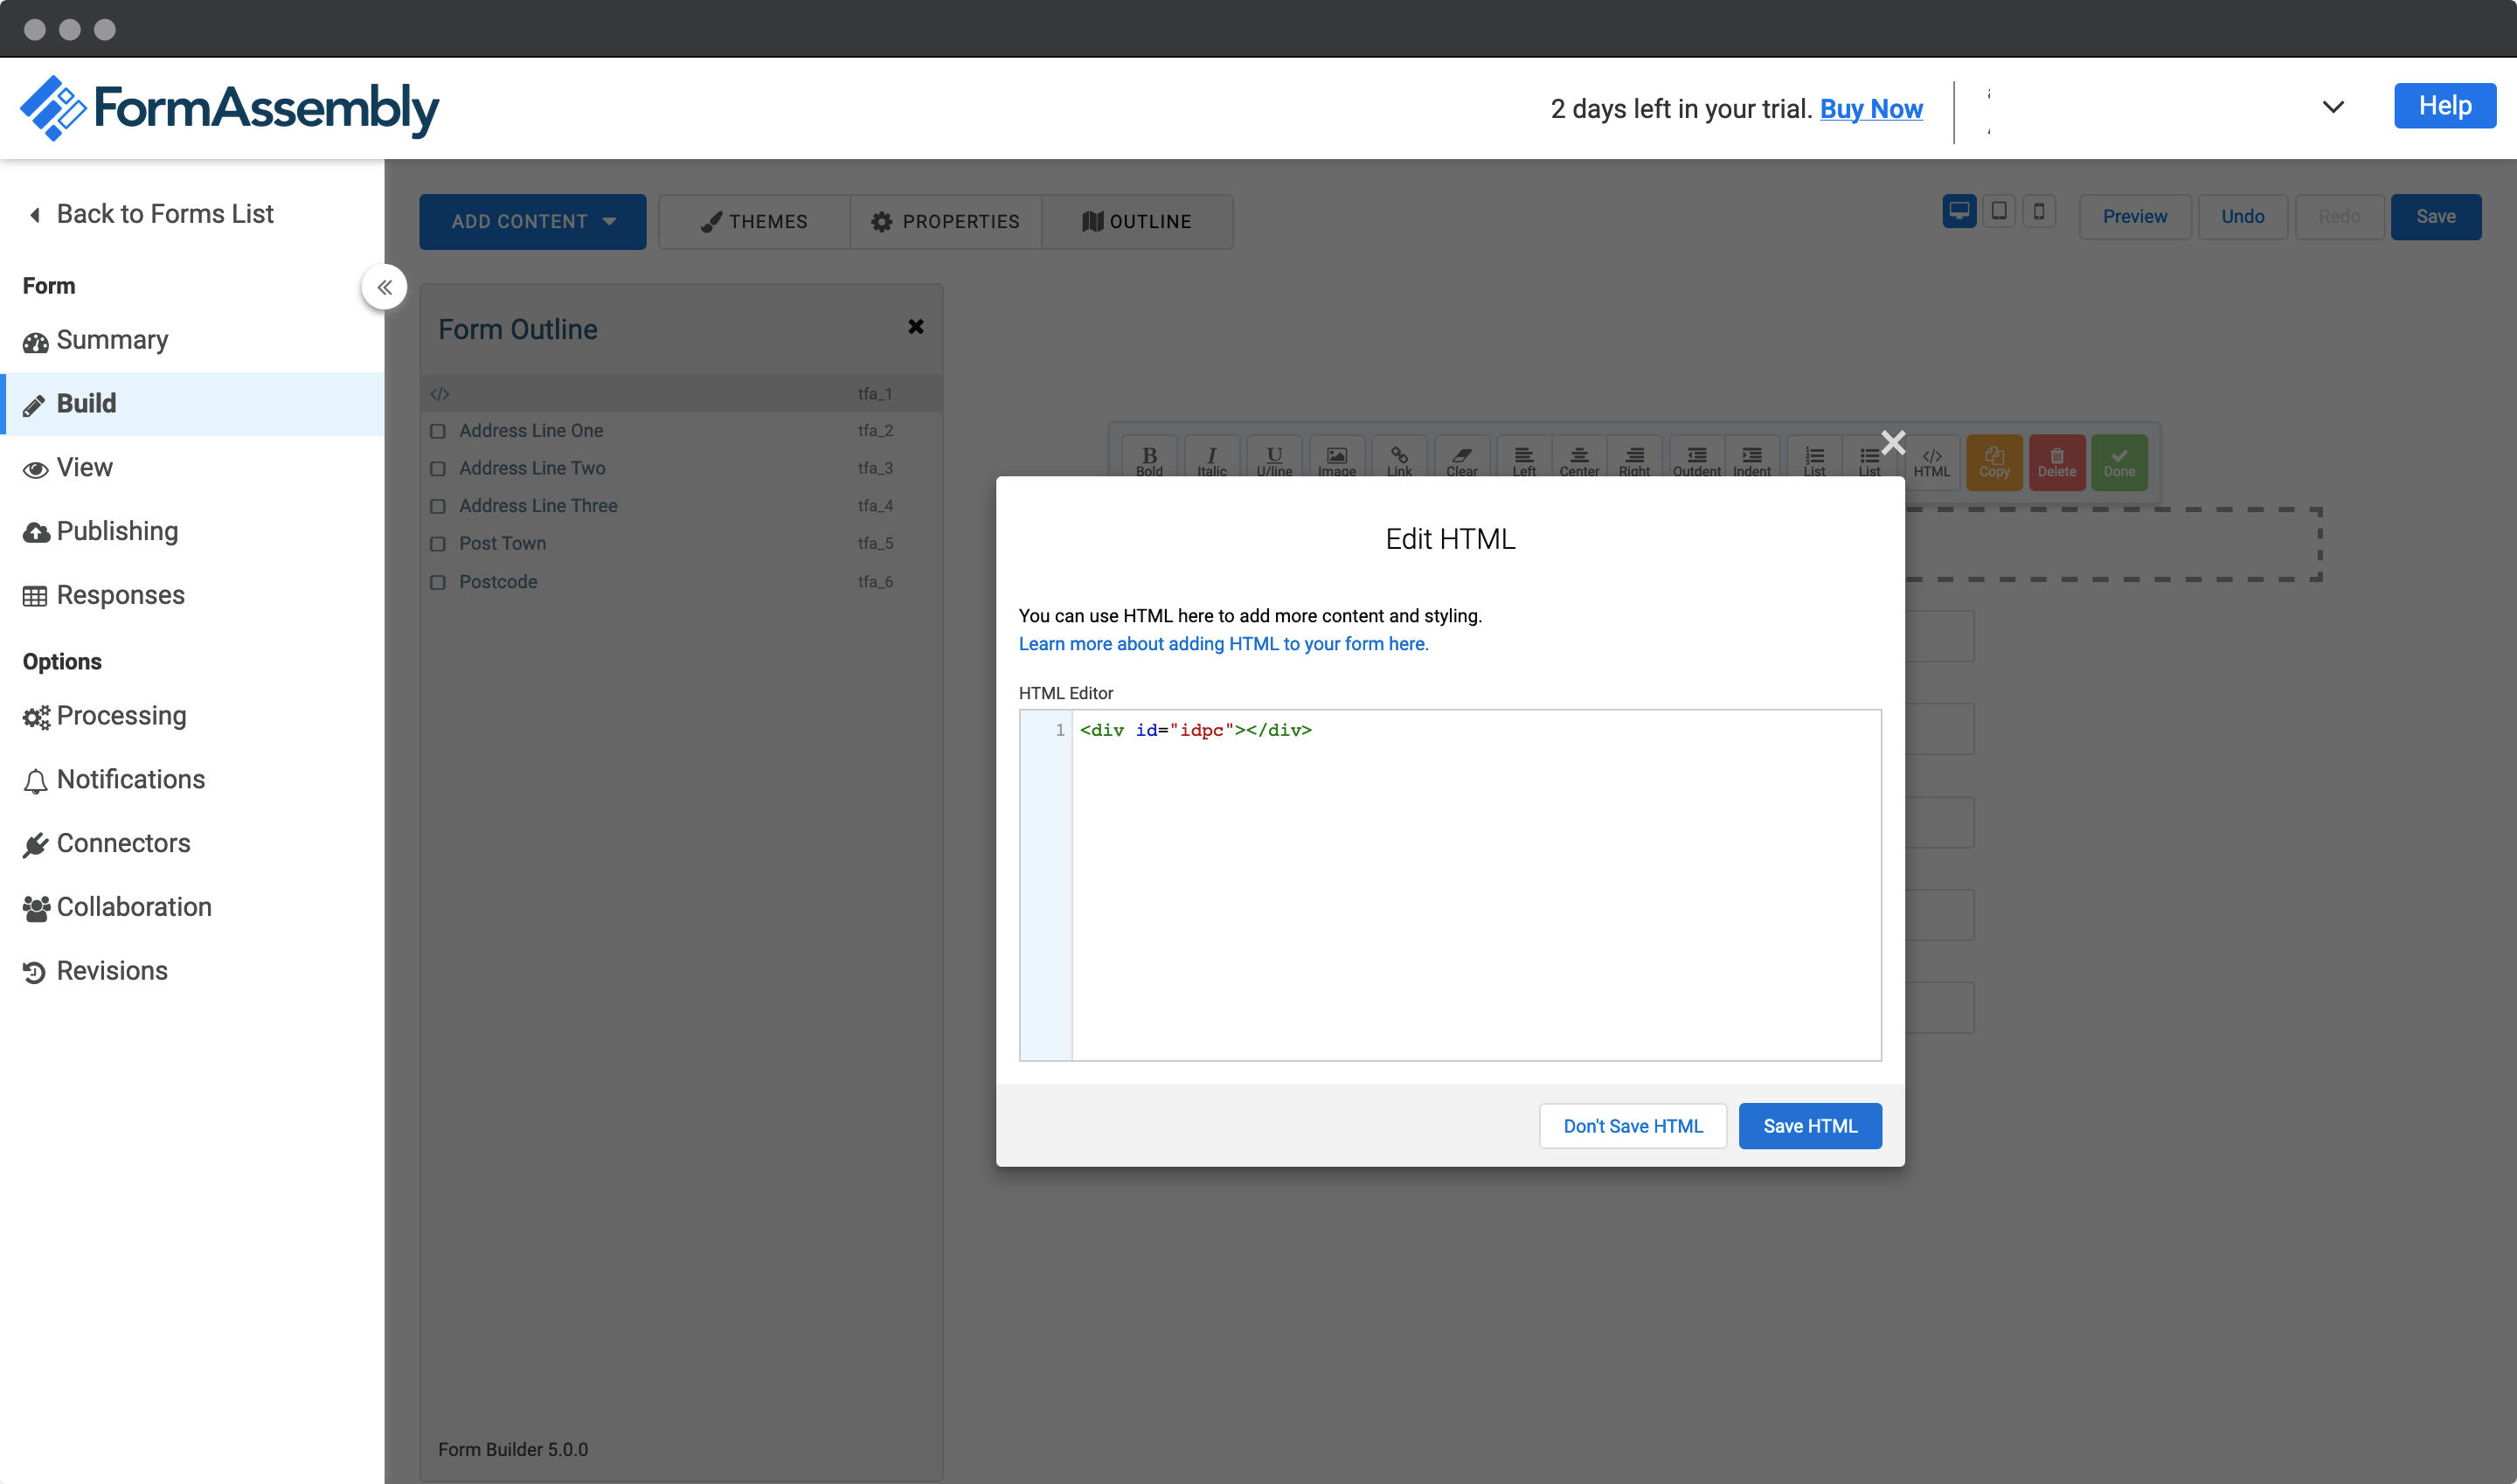
Create a HTML div field above your first address field to scaffold your postcode search field, search button and address dropdown for the plugin.
To do so, click on the blue 'Add Content' button, followed by 'Text and Image' and select the 'Text' option. This should open the toolbar, to which you should click on the 'HTML' option. An 'Edit HTML' modal should display on screen and in the editor, add the following markup and click on 'Save HTML':
<div id="idpc"></div>
Install and Initialise Plugin
Add our Postcode Lookup library to your page with Custom Code. Click the Properties option on the top of the page. Next, in the Form Properties panel, click on Custom Code.
Add and adapt the following to load the plugin and then to initialise it.
<script src="https://cdn.jsdelivr.net/npm/@ideal-postcodes/postcode-lookup-bundled"></script>

<script>
	document.addEventListener("DOMContentLoaded", function () {
		IdealPostcodes.PostcodeLookup.setup({
			apiKey: "YOUR_API_KEY",
			context: "#idpc",
			buttonClass: "postcode-search-button",
			inputClass: "idpc-input",
			selectClass: "idpc-select",
			outputFields: {
				line_1: 'input[name="tfa_2"]',
				line_2: 'input[name="tfa_3"]',
				line_3: 'input[name="tfa_4"]',
				post_town: 'input[name="tfa_5"]',
				postcode: 'input[name="tfa_6"]',
			},
		});
	});
</script>
Take special care to:
- Insert your API Key in the
apiKeyfield - Match the names of your target fields. If your Address Line One has the shortcode
[text* line_1], ensure thatline_1reads'input[name="line_1"]'. Do this for all the address fields you wish to include - Ensure
button,inputandselectContainermatches theids of the lookup button, lookup field and address dropdown container in the fields created in Step 2 - Ensure the
contextstring matches theidof the last<div>. E.g. if<div id="idpc"></div>, the line of code should readcontext: "#idpc"
If you wish to add an additional field, include the parameter name from our documentation. For instance, adding a county field with name county will look like:
outputFields: {
  line_1: 'input[name="tfa_2]',
  line_2: 'input[name="tfa_3"]',
  line_3: 'input[name="tfa_4"]',
  post_town: 'input[name="tfa_5"]',
  county: 'input[name="tfa_6"]',
  postcode: 'input[name="tfa_7"]'
}
You may also style the elements in your form. To do so, in the 'Custom Code' section on the 'Form Properties' panel, please add a style tag. This should be above the script tags added to initialise the plugin. The button, select and input elements can be targeted by the buttonClass, selectClass and inputClass values.
Configuration
See our Address Finder Plugin Documentation if you wish to customise Address Finder.
See our Postcode Lookup Plugin Documentation if you wish to customise Postcode Lookup.
Still need help? Contact our support team via live chat on our website or email support@ideal-postcodes.co.uk.